DIY Natural Cleaners for Sparkling Bathroom Tiles
Keeping bathroom tiles clean can be a daunting task, but using natural cleaners can make the process easier and more eco-friendly. DIY natural cleaners are not only effective but also safe for your family and the environment. Here are some simple recipes and techniques for sparkling bathroom tiles.
- Lemon Juice and Baking Soda Scrub Lemon juice is a natural bleaching agent and deodorizer, while baking soda is a mild abrasive that can lift stains. To make a powerful tile cleaner, mix lemon juice with baking soda to form a paste. Apply the paste to the tiles using a sponge or cloth, and scrub gently. The acidity of the lemon will break down grime and soap scum, leaving your tiles shiny and clean. Rinse thoroughly with water and dry with a clean towel.
- White Vinegar and Water Solution White vinegar is a versatile natural cleaner that can effectively clean bathroom tiles. Mix equal parts white vinegar and water in a spray bottle. Spray the solution onto the tiles and let it sit for about 10 minutes to break down dirt and grime. Wipe clean with a sponge or cloth, and rinse with water. Vinegar’s acidity helps dissolve mineral deposits and soap scum, making it an excellent choice for tile cleaning.
- Hydrogen Peroxide and Baking Soda Paste For tougher stains and mold, hydrogen peroxide combined with baking soda can work wonders. Mix hydrogen peroxide with baking soda to create a thick paste. Apply the paste to stained areas and let it sit for about 15 minutes. Scrub the tiles with a brush or sponge, then rinse thoroughly with water. Hydrogen peroxide has bleaching properties that can remove stains and kill mold spores, leaving your tiles clean and disinfected.
- Castile Soap and Essential Oils Castile soap is a natural, vegetable-based soap that can be used to clean tiles without harsh chemicals. Mix a few drops of castile soap with warm water in a spray bottle. For added cleaning power and a pleasant scent, add a few drops of essential oils such as tea tree oil or lavender oil. Spray the solution onto the tiles and wipe clean with a cloth or sponge. This gentle cleaner is perfect for regular maintenance and leaves your bathroom smelling fresh.
- Olive Oil and Lemon Juice Polish To give your tiles a natural shine, mix equal parts olive oil and lemon juice. Apply the mixture to the tiles with a soft cloth and buff in a circular motion. This natural polish not only cleans but also leaves a protective layer that enhances the tiles’ shine. Olive oil nourishes the surface, while lemon juice provides a refreshing scent.
- Salt and Grapefruit Scrub For a natural abrasive cleaner cut a grapefruit in half and sprinkle salt on the exposed flesh. Use the grapefruit as a scrubber to clean the tiles. The citric acid in the grapefruit helps break down grime, while the salt acts as a gentle abrasive to lift dirt. Rinse with water and enjoy the fresh, clean scent left behind.

The Power of Baking Soda and Vinegar for Tile Cleaning
Baking soda and vinegar are two of the most versatile and powerful natural cleaners available. When combined, they create a chemical reaction that can tackle tough stains, grime, and soap scum on bathroom tiles. Here’s how to harness the power of baking soda and vinegar for tile cleaning.
Understanding the Chemical Reaction When baking soda (a base) and vinegar (an acid) are mixed together, they produce carbon dioxide gas through a fizzing reaction. This reaction helps to lift and break down dirt and grime from surfaces. The abrasive nature of baking soda combined with the dissolving power of vinegar makes this duo particularly effective for cleaning tiles.
Baking Soda and Vinegar Paste For stubborn stains and grime, create a paste by mixing baking soda with a small amount of water. Apply the paste to the tiles and grout lines using a brush or sponge. Spray white vinegar over the baking soda paste and let the mixture sit for 10-15 minutes. The fizzing action will help to break down the dirt. Scrub the tiles and grout with a brush, then rinse with water and wipe dry.
Cleaning Grout Lines Grout lines can be particularly challenging to clean due to their porous nature. To clean grout lines effectively, sprinkle baking soda along the lines and spray with vinegar. Let the mixture sit and fizz for a few minutes, then scrub with an old toothbrush or grout brush. The abrasive texture of baking soda helps to remove embedded dirt, while vinegar dissolves stains and kills bacteria.
Removing Soap Scum and Hard Water Stains Soap scum and hard water stains can make bathroom tiles look dull and dirty. Sprinkle baking soda over the affected areas and spray with vinegar. Allow the mixture to sit for a few minutes, then scrub with a sponge or brush. The fizzy reaction helps to loosen and dissolve the soap scum and mineral deposits, leaving your tiles clean and shiny.
Deodorizing and Disinfecting Vinegar has natural deodorizing and disinfecting properties. To keep your bathroom smelling fresh and clean, spray a mixture of equal parts vinegar and water onto the tiles and let it sit for a few minutes before wiping clean. This simple solution can help to eliminate odors and kill bacteria, ensuring a hygienic bathroom environment.
Regular Maintenance Cleaning For regular maintenance, you can use a mixture of baking soda and water to scrub the tiles, followed by a rinse with vinegar and water. This routine can help to prevent the buildup of grime and keep your tiles looking their best. Regular cleaning with baking soda and vinegar is a safe and effective way to maintain a clean and healthy bathroom.
How to Remove Stubborn Mold and Mildew from Bathroom Tiles
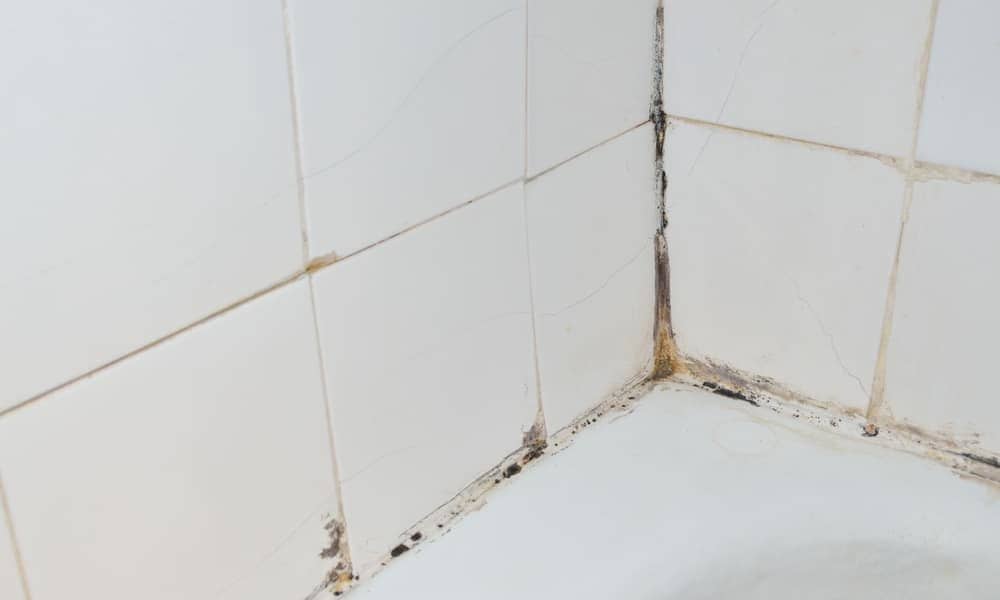
Mold and mildew are common problems in bathrooms due to the high humidity and moisture levels. Removing these stubborn fungi from bathroom tiles is crucial for maintaining a clean and healthy environment. Here are some effective methods for tackling mold and mildew on bathroom tiles.
Vinegar and Baking Soda Method Vinegar is a natural antifungal agent that can kill mold and mildew. Mix equal parts white vinegar and water in a spray bottle. Spray the affected areas with the solution and let it sit for an hour. For stubborn spots, create a paste with baking soda and water, and apply it to the moldy areas. Spray vinegar over the paste and scrub with a brush. Rinse with water and dry thoroughly.
Hydrogen Peroxide Solution Hydrogen peroxide is another effective mold killer. Pour 3% hydrogen peroxide into a spray bottle and spray directly onto the moldy tiles. Let it sit for 10-15 minutes, then scrub with a brush to remove the mold. Rinse with water and wipe dry. Hydrogen peroxide not only kills mold but also helps to lighten stains, leaving your tiles clean and bright.
Tea Tree Oil Spray Tea tree oil is a natural antifungal and antibacterial agent that can effectively eliminate mold and mildew. Mix one teaspoon of tea tree oil with one cup of water in a spray bottle. Shake well and spray the solution onto the moldy tiles. Let it sit for a few hours or overnight. Scrub the area with a brush, then rinse with water and dry. Tea tree oil’s strong scent also helps to deodorize the bathroom.
Bleach Solution For severe mold and mildew infestations, bleach can be a powerful solution. Mix one part bleach with three parts water in a spray bottle. Spray the solution onto the moldy tiles and let it sit for 10-15 minutes. Scrub the area with a brush, then rinse thoroughly with water. Be sure to use bleach in a well-ventilated area and wear gloves to protect your skin.
Preventing Mold and Mildew Growth Preventing mold and mildew growth is essential for maintaining a clean bathroom. Ensure proper ventilation by using an exhaust fan or opening a window during and after showers. Wipe down tiles and grout lines regularly to remove excess moisture. Using a squeegee to remove water from tiles after each shower can also help prevent mold and mildew buildup.
Regular Maintenance and Inspection Regularly inspect your bathroom for signs of mold and mildew, especially in areas prone to moisture. Clean your tiles and grout lines regularly with a mixture of vinegar and water or a mild detergent. Address any leaks or water damage promptly to prevent mold growth. By maintaining a clean and dry bathroom environment, you can effectively keep mold and mildew at bay.
Effective Techniques for Cleaning Grout Between Tiles
Grout lines can be challenging to clean due to their porous nature and tendency to accumulate dirt, grime, and stains. Keeping grout lines clean is essential for maintaining the overall appearance and hygiene of your bathroom. Here are some effective techniques for cleaning grout between tiles.
Baking Soda and Water Paste One of the most effective and natural ways to clean grout is using baking soda and water paste. Mix baking soda with water to form a thick paste. Apply the paste to the grout lines using an old toothbrush or grout brush. Let it sit for a few minutes to allow the baking soda to penetrate and lift the dirt. Scrub the grout lines vigorously, then rinse with water and wipe clean.
Hydrogen Peroxide and Baking Soda For tougher stains, a mixture of hydrogen peroxide and baking soda can work wonders. Mix hydrogen peroxide with baking soda to create a paste. Apply the paste to the grout lines and let it sit for about 10 minutes. The hydrogen peroxide will help to break down stains and disinfect the area. Scrub the grout lines with a brush, then rinse with water and wipe dry.
Vinegar and Water Solution White vinegar is a powerful natural cleaner that can effectively clean and disinfect grout lines. Mix equal parts white vinegar and water in a spray bottle. Spray the solution onto the grout lines and let it sit for about 10 minutes. Scrub the grout lines with a brush to remove dirt and stains. Rinse with water and wipe clean. Vinegar’s acidity helps dissolve grime and kills bacteria, making it an excellent choice for grout cleaning.
Steam Cleaning Steam cleaning is a highly effective method for cleaning grout lines without the need for harsh chemicals. A steam cleaner uses high-temperature steam to break down dirt and grime in grout lines. Simply direct the steam nozzle along the grout lines and let the steam do the work. Wipe away the loosened dirt with a cloth or sponge. Steam cleaning not only cleans but also sanitizes the grout lines, making it a great option for deep cleaning.
Oxygen Bleach Solution Oxygen bleach is a safe and effective cleaner for grout lines. Mix oxygen bleach with water according to the manufacturer’s instructions. Apply the solution to the grout lines and let it sit for about 15 minutes. The oxygen bleach will break down stains and disinfect the area. Scrub the grout lines with a brush, then rinse with water and wipe clean. Oxygen bleach is less harsh than chlorine bleach and is safe for most tile surfaces.
Regular Maintenance and Sealing Regular maintenance is key to keeping grout lines clean. Wipe down tiles and grout lines after each use to remove excess moisture and prevent the buildup of dirt and grime. Consider sealing your grout lines with a grout sealer to protect them from stains and moisture. Sealing the grout creates a barrier that makes cleaning easier and helps maintain the grout’s appearance.
The Benefits of Steam Cleaning for Bathroom Tiles
Steam cleaning is an effective and eco-friendly method for cleaning bathroom tiles. It uses high-temperature steam to break down dirt, grime, and bacteria without the need for harsh chemicals. Here are some of the key benefits of steam cleaning for bathroom tiles.
Chemical-Free Cleaning One of the main advantages of steam cleaning is that it requires no chemicals. The high-temperature steam is powerful enough to dissolve dirt, grease, and grime, making it an ideal choice for those looking to avoid harsh cleaning agents. This makes steam cleaning safe for your family and the environment.
Deep Cleaning and Sanitizing Steam cleaning provides a deep clean that goes beyond the surface. The high-temperature steam penetrates pores and crevices, effectively removing dirt, bacteria, and mold from tiles and grout lines. This deep cleaning action helps to sanitize your bathroom, reducing the risk of mold growth and improving overall hygiene.
Effective Mold and Mildew Removal Mold and mildew thrive in the damp and humid environment of bathrooms. Steam cleaning can effectively kill mold spores and remove mildew from tiles and grout lines. The high temperature of the steam kills mold and mildew on contact, helping to prevent their regrowth and ensuring a clean and healthy bathroom environment.
Safe for Most Surfaces Steam cleaning is safe for most tile surfaces, including ceramic, porcelain, and natural stone. It can be used on both tiles and grout without causing damage. However, it’s important to avoid using steam on cracked or damaged tiles, as the high temperature can exacerbate existing issues.
Easy and Efficient Steam cleaning is an easy and efficient method for cleaning bathroom tiles. Most steam cleaners come with various attachments designed for different surfaces and cleaning tasks. Simply fill the steam cleaner with water, heat it up, and start cleaning. The steam loosens dirt and grime, making it easy to wipe away with a cloth or sponge.
Eco-Friendly and Cost-Effective Steam cleaning is an eco-friendly option because it uses only water and heat. There are no chemicals or cleaning agents required, reducing the environmental impact. Additionally, steam cleaners are cost-effective in the long run, as you don’t need to purchase cleaning products. A one-time investment in a good steam cleaner can save you money on cleaning supplies over time.
Preventing Soap Scum Buildup on Bathroom Tiles
Soap scum buildup on bathroom tiles can make your bathroom look dirty and unappealing. Preventing soap scum is easier than removing it once it has accumulated. Here are some effective tips and techniques for preventing soap scum buildup on bathroom tiles.
Use Liquid Soap Instead of Bar Soap One of the primary causes of soap scum is the use of bar soap. Bar soap contains fatty acids that combine with minerals in water to form soap scum. Switching to liquid soap or body wash can significantly reduce soap scum buildup. Liquid soap rinses away more easily and doesn’t leave behind the same residue as bar soap.
Install a Water Softener Hard water, which contains high levels of minerals such as calcium and magnesium, contributes to soap scum buildup. Installing a water softener can reduce the mineral content in your water, making it less likely for soap scum to form. Softened water not only helps prevent soap scum but also makes cleaning easier and extends the life of your plumbing fixtures.
Rinse and Wipe Down Tiles After Each Use A simple but effective way to prevent soap scum buildup is to rinse and wipe down your bathroom tiles after each use. Use a handheld showerhead to rinse the tiles thoroughly, then wipe them dry with a squeegee or microfiber cloth. This practice removes soap residue and excess moisture, preventing soap scum from forming.
Apply a Tile Sealant Applying a tile sealant can create a protective barrier that prevents soap scum from adhering to the tiles. Sealants are available for both tiles and grout and can be applied easily with a brush or spray. Reapply the sealant periodically, as recommended by the manufacturer, to maintain its effectiveness.
Regular Cleaning with Vinegar and Water Regular cleaning with vinegar and water solution can help prevent soap scum buildup. Mix equal parts white vinegar and water in a spray bottle and spray the solution onto the tiles after each use. Vinegar’s acidity helps to dissolve soap residue and prevent it from accumulating. Wipe the tiles with a cloth or sponge, then rinse with water.
Use a Shower Cleaner Spray Consider using a daily shower cleaner spray to keep soap scum at bay. These sprays are designed to prevent soap scum and mildew buildup with regular use. Simply spray the cleaner onto the tiles after each shower and let it sit. There’s no need to rinse or wipe, making it a convenient option for busy households.
Quick Tips for Keeping Bathroom Tiles Clean and Shiny
Keeping bathroom tiles clean and shiny can enhance the overall appearance of your bathroom and create a more inviting space. Here are some quick and easy tips to maintain sparkling tiles with minimal effort.
Regular Wiping and Drying One of the simplest ways to keep your bathroom tiles clean is to wipe them down regularly. Use a microfiber cloth or squeegee to dry the tiles after each use. This practice prevents water spots, soap scum, and mildew from forming. A quick wipe-down takes only a few seconds but can make a significant difference in maintaining clean and shiny tiles.
Use a Daily Shower Cleaner Using a daily shower cleaner can help keep your tiles clean with minimal effort. These cleaners are designed to prevent soap scum, mildew, and hard water stains. Simply spray the cleaner onto the tiles after each shower and let it work its magic. There’s no need to scrub or rinse, making it a convenient option for busy households.
Incorporate Vinegar and Water Cleaning Vinegar is a natural cleaner that can effectively remove soap scum and hard water stains. Mix equal parts white vinegar and water in a spray bottle and use it to clean your tiles regularly. Spray the solution onto the tiles, let it sit for a few minutes, then wipe clean with a cloth or sponge. Vinegar’s acidity helps dissolve grime and leaves tiles shiny.
Use Baking Soda for Tough Stains For tougher stains and grime, baking soda is an excellent natural cleaner. Create a paste by mixing baking soda with water and applying it to the stained areas. Let it sit for a few minutes, then scrub it with a brush or sponge. Baking soda’s abrasive nature helps lift stains without scratching the tiles. Rinse with water and wipe dry.
Steam Clean for Deep Cleaning Steam cleaning is a highly effective method for deep cleaning bathroom tiles. A steam cleaner uses high-temperature steam to break down dirt, grime, and bacteria without the need for chemicals. Simply direct the steam nozzle at the tiles and grout lines, then wipe away the loosened dirt with a cloth. Steam cleaning not only cleans but also sanitizes, leaving your tiles sparkling.
Polish with Olive Oil For an extra shine, consider polishing your tiles with a small amount of olive oil. Apply a few drops of olive oil to a soft cloth and buff the tiles in a circular motion. Olive oil nourishes the tile surface and enhances its shine, giving your bathroom a polished and clean appearance. Be sure to wipe away any excess oil to avoid slippery surfaces.
Common Mistakes to Avoid When Cleaning Bathroom Tiles
Cleaning bathroom tiles might seem straightforward, but there are common mistakes that can lead to less effective cleaning or even damage to the tiles. Avoiding these mistakes can help you achieve better results and prolong the life of your bathroom tiles. Here are some common mistakes to avoid.
Using Harsh Chemicals Using harsh chemicals such as bleach or abrasive cleaners can damage your tiles and grout. These chemicals can erode the surface of the tiles, causing them to become dull and discolored. Instead, opt for mild, natural cleaners like vinegar, baking soda, and hydrogen peroxide, which are effective yet gentle on your tiles.
Ignoring Grout Lines Grout lines are often overlooked during cleaning, but they are prone to dirt, mold, and mildew buildup. Neglecting grout lines can make your bathroom look dirty even if the tiles are clean. Make sure to clean grout lines regularly using a brush and an appropriate cleaner. Keeping grout lines clean enhances the overall appearance of your bathroom.
Using the Wrong Tools Using the wrong cleaning tools, such as hard-bristle brushes or abrasive pads, can scratch and damage your tiles. Instead, use soft cloths, sponges, or microfiber cloths for gentle yet effective cleaning. For tougher stains, use a soft-bristle brush to avoid damaging the tile surface.
Overlooking Regular Maintenance Waiting too long between cleanings can lead to the buildup of dirt, grime, and soap scum, making it more challenging to clean your tiles. Regular maintenance is key to keeping your bathroom tiles in top condition. Establish a routine cleaning schedule to prevent buildup and make cleaning easier.
Not Rinsing Thoroughly Failing to rinse tiles thoroughly after cleaning can leave residue from cleaning products, which can attract more dirt and grime. After cleaning, rinse the tiles with clean water to remove any leftover cleaner and wipe them dry with a cloth or squeegee to prevent water spots and streaks.
Ignoring Proper Ventilation Proper ventilation is crucial for preventing mold and mildew growth in bathrooms. After cleaning, ensure that the bathroom is well-ventilated to allow moisture to evaporate. Use an exhaust fan or open a window to reduce humidity levels and prevent mold and mildew from developing on your tiles and grout.
Best way to clean bathroom tiles with ease
Ways to Clean Shower Tile & Grout (Home Remedies)
Related Posts:
