Understanding Faucet Materials: How to Clean Different Types of Finishes
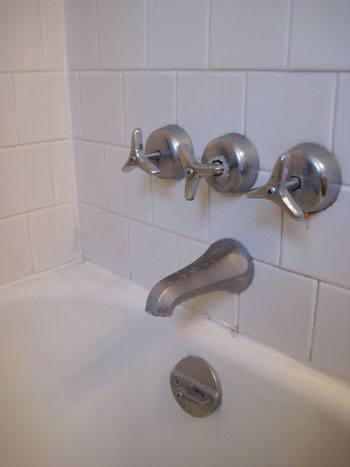
When it comes to cleaning old bathroom faucets, the first thing you need to understand is the material and finish of the faucet. Different finishes require different cleaning methods to avoid damage and keep them looking their best. Let me guide you through the various types of faucet finishes and how to clean each one effectively.
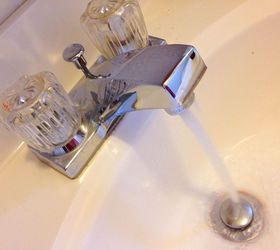
- Chrome Faucets: Chrome is one of the most popular finishes for bathroom faucets, known for its shiny and sleek appearance. However, chrome is also prone to showing water spots and fingerprints, which can dull its shine over time. To clean a chrome faucet, I like to use a mixture of mild dish soap and warm water. Simply dip a soft cloth into the soapy water, wring it out, and gently wipe down the faucet. For tougher spots, you can use a bit of white vinegar on a cloth to cut through the grime. Avoid abrasive cleaners or scrubbers, as they can scratch the surface of the chrome.
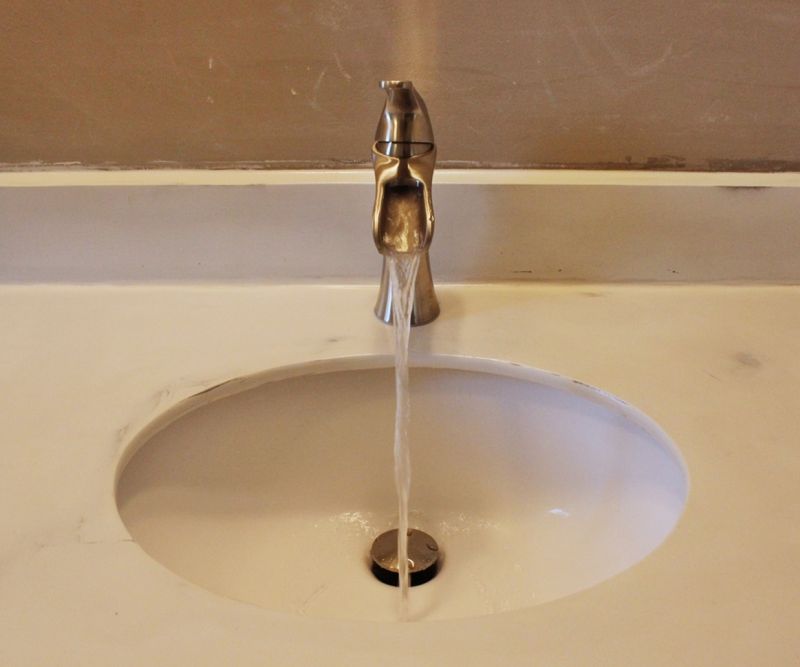
- Brushed Nickel Faucets: Brushed nickel faucets are known for their durability and subtle, matte finish. While they don’t show fingerprints as easily as chrome, they can develop a dull appearance if not cleaned regularly. For brushed nickel, I recommend using a mixture of water and vinegar in equal parts. Spray the solution onto the faucet and wipe it down with a soft cloth. Be sure to dry the faucet thoroughly to prevent water spots. It’s important to avoid using acidic or abrasive cleaners on brushed nickel, as these can damage the finish.
- Brass Faucets: Brass faucets add a touch of luxury to any bathroom, but they require regular maintenance to keep their warm, golden hue. If your brass faucet is unlacquered, it will develop a natural patina over time, which some people find desirable. However, if you prefer to keep the brass looking shiny and new, you’ll need to clean it regularly. I like to use a mixture of lemon juice and baking soda to create a gentle paste. Apply the paste to the faucet with a soft cloth, gently rubbing in a circular motion. Rinse with warm water and dry thoroughly. Lacquered brass faucets should be cleaned with mild soap and water only, as harsher chemicals can strip the lacquer.
- Bronze Faucets: Bronze faucets, especially oil-rubbed bronze, are popular for their rich, dark color and rustic appeal. However, this finish can be more delicate than others, requiring careful cleaning to maintain its appearance. For bronze faucets, I use a gentle mixture of water and a non-abrasive soap. Avoid acidic cleaners, as they can strip the finish and cause discoloration. After cleaning, it’s important to dry the faucet completely and apply a light coat of wax or oil to protect the finish and enhance its shine.
- Stainless Steel Faucets: Stainless steel is a common material for bathroom faucets due to its durability and resistance to corrosion. However, it can still show water spots and fingerprints. To clean stainless steel faucets, I find that a mixture of water and white vinegar works well. Simply spray the solution onto the faucet and wipe it down with a microfiber cloth. For a streak-free shine, buff the faucet dry with a clean, dry cloth. Avoid using bleach or any cleaner containing chlorine on stainless steel, as these can cause pitting and discoloration.
- Gold-Plated Faucets: Gold-plated faucets bring a touch of glamour to the bathroom, but they require gentle care to avoid damaging the delicate finish. When cleaning gold-plated faucets, I recommend using only mild dish soap and water. Apply the soapy water with a soft cloth, being careful not to scrub too hard. Rinse with clean water and dry with a soft, lint-free cloth. Never use abrasive cleaners, brushes, or sponges on gold-plated faucets, as these can easily scratch and tarnish the surface.
The Essential Tools and Supplies for Cleaning Old Faucets
Cleaning old bathroom faucets can be a rewarding task when you have the right tools and supplies on hand. Having a well-stocked cleaning kit makes the process smoother and ensures that you’re prepared for any grime, buildup, or stains you might encounter. Below are the essential tools and supplies I keep handy when tackling the job of cleaning old faucets.
Soft Cloths and Microfiber Towels: When it comes to cleaning faucets, soft cloths, and microfiber towels are indispensable. They’re gentle on the various finishes and materials used in faucets, reducing the risk of scratches. I like to keep a variety of these clothes on hand—microfiber towels are excellent for buffing and polishing, while soft cotton cloths are perfect for applying cleaners and wiping down surfaces. Having a good supply of these ensures that you’re always ready to tackle any cleaning task without causing damage to your faucets.
Mild Dish Soap: Mild dish soap is a staple in my cleaning arsenal. It’s gentle enough to use on a variety of finishes, including chrome, stainless steel, and even gold-plated faucets. When mixed with warm water, dish soap effectively cuts through grease, grime, and buildup without the need for harsh chemicals. I always keep a bottle of dish soap nearby for quick cleanups and regular maintenance. It’s also great for cleaning other bathroom surfaces, making it a versatile addition to your cleaning supplies.
White Vinegar: White vinegar is one of my favorite natural cleaners, especially for tackling water spots, mineral deposits, and soap scum. It’s safe to use on most faucet finishes, although I avoid using it on delicate surfaces like marble or gold plating. I usually mix equal parts of white vinegar and water in a spray bottle for easy application. Vinegar’s acidity helps dissolve stubborn buildup, making it a powerful yet gentle cleaning solution. Plus, it’s environmentally friendly and readily available in most households.
Baking Soda: For those times when you need a little extra scrubbing power, baking soda is my go-to solution. Its mild abrasiveness makes it effective for removing stains and buildup without scratching surfaces. I often combine baking soda with a bit of water or lemon juice to create a paste, which I then apply to the faucet with a soft cloth. This paste is particularly useful for cleaning brass or stainless steel faucets that have developed stubborn spots or tarnish over time.
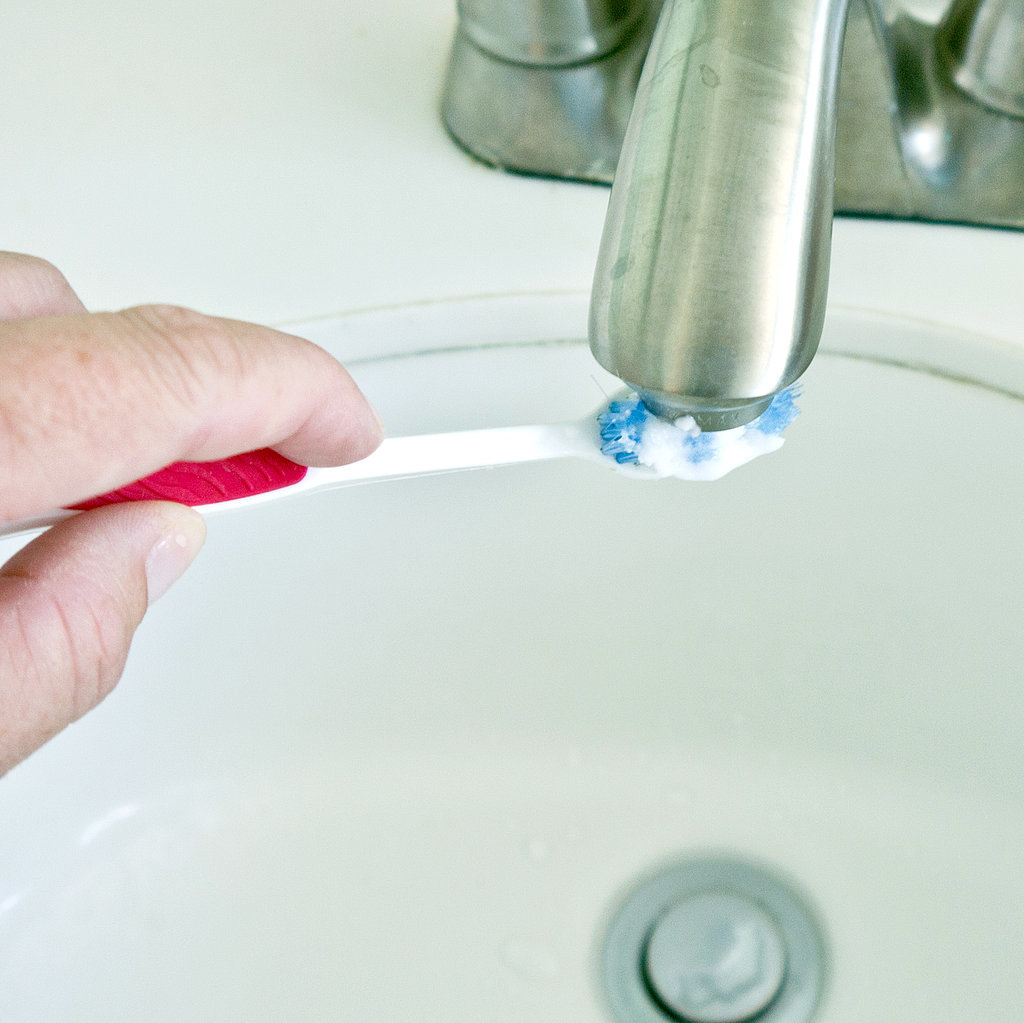
Soft-Bristled Toothbrush: A soft-bristled toothbrush is an essential tool for getting into those hard-to-reach areas around the faucet, such as around the handles, spout, and where the faucet meets the sink. I prefer using a toothbrush with soft bristles to avoid scratching the finish. This tool is especially helpful when cleaning intricate designs or tight corners where dirt and grime tend to accumulate. It’s also great for scrubbing away mineral deposits and other stubborn buildup without damaging the faucet’s surface.
Non-Abrasive Scrub Pads: Sometimes, a little more scrubbing power is needed, and that’s where non-abrasive scrub pads come in handy. These pads provide a bit of extra muscle for cleaning without the risk of scratching delicate surfaces. I use them for more challenging cleaning tasks, like removing lime scale or soap scum from stainless steel or chrome faucets. Just be sure to choose a pad that’s labeled as non-abrasive, as harsher scrubbers can easily damage the finish of your faucet.
Step-by-Step Guide: Deep Cleaning Your Bathroom Faucet
Every now and then, your bathroom faucet needs more than just a quick wipe-down—it requires a deep cleaning to restore its original shine and functionality. Deep cleaning not only improves the appearance of your faucet but also helps maintain its performance by removing buildup that can affect water flow. In this section, I’ll walk you through a step-by-step guide to deep cleaning your bathroom faucet, making sure it looks and works like new.
Gather Your Supplies: Before starting, make sure you have all the necessary supplies on hand. You’ll need soft cloths, a microfiber towel, mild dish soap, white vinegar, baking soda, a soft-bristled toothbrush, and a non-abrasive scrub pad. Having everything ready beforehand makes the cleaning process smoother and more efficient. Also, make sure to turn off the water supply to the faucet before you begin, just in case you need to disassemble any parts.
Remove and Soak Faucet Parts: For a truly deep clean, it’s important to remove any detachable parts of the faucet, such as the aerator, handles, or spout caps. These parts often accumulate a lot of hidden grime and mineral deposits. I like to soak these components in a mixture of warm water and vinegar for about 30 minutes. The vinegar helps dissolve mineral buildup, making it easier to scrub away later. While the parts are soaking, you can start cleaning the rest of the faucet.
Clean the Faucet Body: Next, focus on cleaning the body of the faucet. Dip a soft cloth in a mixture of warm water and mild dish soap, and gently wipe down the entire faucet. Pay special attention to areas around the base and handles, where grime tends to accumulate. For more stubborn spots, you can use the non-abrasive scrub pad or apply a paste of baking soda and water. Use a soft-bristled toothbrush to get into tight corners and crevices, ensuring every part of the faucet is thoroughly cleaned.
Scrub Away Mineral Deposits: Mineral deposits can build up over time, especially around the aerator and spout, affecting the flow of water. After soaking the faucet parts, use a toothbrush to scrub away any remaining deposits. For tough buildup, you can apply a bit of baking soda or use a vinegar-soaked cloth to scrub the area. Once the deposits are removed, rinse the parts thoroughly with warm water and set them aside to dry.
Reassemble and Polish: After cleaning and drying all the parts, it’s time to reassemble the faucet. Carefully reattach the aerator, handles, and any other components you removed earlier. Once everything is back in place, give the entire faucet a final wipe-down with a microfiber towel to remove any remaining water spots and polish the surface. This final step not only enhances the faucet’s appearance but also helps prevent future buildup by removing any moisture that could cause spots.
Regular Maintenance: Now that your faucet is sparkling clean, it’s important to maintain it regularly to keep it looking its best. I recommend wiping down the faucet with a soft cloth after each use to prevent water spots and grime buildup. You can also do a quick clean with mild soap and water once a week to keep your faucet in top condition. By following these simple maintenance tips, you’ll ensure that your faucet stays clean and functions properly for years to come.
Natural Cleaning Solutions
When it comes to cleaning bathroom faucets, you don’t always need to reach for harsh chemicals to get the job done. Natural cleaning solutions can be just as effective, and they’re often gentler on your faucets, your health, and the environment. In this section, I’ll share some of my favorite natural cleaning methods for removing stubborn stains and buildup from old bathroom faucets.
White Vinegar: A Powerful, All-Natural Cleaner
White vinegar is a go-to natural cleaner in my home, thanks to its acidic properties that help dissolve mineral deposits, soap scum, and grime. To use vinegar on your faucet, simply mix equal parts of white vinegar and water in a spray bottle. Spray the solution onto the faucet and let it sit for a few minutes to break down any buildup. Then, wipe it clean with a soft cloth. For tougher stains, you can soak a cloth in undiluted vinegar and wrap it around the affected area for 10-15 minutes before scrubbing gently with a soft-bristled toothbrush.
Baking Soda: A Gentle Abrasive for Tough Stains
Baking soda is another natural cleaning powerhouse that I often use for removing stubborn stains. Its mild abrasive nature makes it perfect for scrubbing away grime without scratching the faucet’s surface. To clean your faucet with baking soda, mix it with a small amount of water to form a paste. Apply the paste to the stained areas of the faucet and let it sit for a few minutes. Then, use a soft cloth or toothbrush to gently scrub the area before rinsing with warm water. Baking soda is especially effective on stainless steel and chrome faucets, restoring their shine.
Lemon Juice: A Natural Acidic Cleaner
Lemon juice is not only great for adding flavor to your dishes, but it’s also an excellent natural cleaner, thanks to its acidity. I love using lemon juice to tackle water spots and mineral deposits on faucets. To use, simply cut a lemon in half and rub it directly onto the faucet, paying extra attention to areas with stains or buildup. The acidity in the lemon juice helps dissolve the deposits, leaving your faucet clean and shiny. After scrubbing with the lemon, rinse the faucet with warm water and dry it with a soft cloth.
Olive Oil: Adding Shine and Protection
Olive oil might not be the first thing that comes to mind when cleaning faucets, but it’s actually a great natural polish that can add shine and help protect the finish of your faucet. After cleaning your faucet with vinegar, baking soda, or lemon juice, apply a small amount of olive oil to a soft cloth and gently buff the faucet’s surface. This not only enhances the shine but also helps repel water, reducing the chances of water spots forming in the future. Olive oil works particularly well on stainless steel and bronze finishes.
Essential Oils: A Pleasant Aroma and Extra Cleaning Power
Essential oils, such as tea tree oil or eucalyptus oil, can add a pleasant aroma to your cleaning routine and provide additional cleaning power. These oils have natural antibacterial properties, making them a great addition to your faucet cleaning regimen. I like to add a few drops of essential oil to my vinegar and water mixture before spraying it onto the faucet. Not only does it help clean, but it also leaves the bathroom smelling fresh and clean. Be sure to choose essential oils that are safe for your specific faucet finish.
Combining Natural Ingredients: The Ultimate Cleaning Solution
For particularly tough stains or buildup, I sometimes combine several natural ingredients to create a more powerful cleaning solution. For example, you can mix baking soda with a bit of lemon juice to form a paste that’s both abrasive and acidic, making it effective at removing even the most stubborn grime. Or, try combining vinegar with a few drops of tea tree oil for an antibacterial cleaning spray that tackles dirt while leaving behind a fresh scent. Experiment with different combinations to find the natural cleaning solution that works best for your faucets.
Dealing with Mineral Buildup: Removing Lime and Calcium Deposits
One of the most common challenges when cleaning old bathroom faucets is dealing with mineral buildup, such as lime and calcium deposits. These unsightly white or greenish stains can make your faucets look dirty and can even affect their functionality over time. Below is the process of removing mineral deposits from your faucets to restore their appearance and ensure they work smoothly.
Understanding Mineral Buildup: What Causes It?
Mineral buildup occurs when hard water, which contains high levels of minerals like calcium and magnesium, evaporates and leaves behind these minerals on surfaces. Over time, these deposits can accumulate on your faucets, leading to white, chalky stains or greenish deposits around the spout and handles. If left untreated, mineral buildup can clog the aerator, reduce water flow, and even cause permanent damage to the faucet’s finish. That’s why it’s important to address mineral deposits as soon as you notice them.
Vinegar Soak: A Simple Solution for Stubborn Buildup
White vinegar is one of the most effective natural solutions for removing mineral deposits from faucets. To tackle tough buildup, I recommend soaking a cloth in white vinegar and wrapping it around the affected areas of the faucet. Let the vinegar-soaked cloth sit for at least 15-30 minutes, depending on the severity of the buildup. The acidity of the vinegar helps dissolve the minerals, making it easier to scrub away. After soaking, use a soft cloth or a toothbrush to gently scrub the deposits away. Rinse with warm water and dry the faucet thoroughly.
Targeting the Aerator: Restoring Water Flow
The aerator is a small screen located at the tip of the faucet spout, and it’s particularly prone to mineral buildup. A clogged aerator can reduce water flow or cause the water to spray unevenly. To clean the aerator, start by unscrewing it from the faucet (you may need a wrench for this, but be gentle to avoid scratching the faucet). Soak the aerator in vinegar for about 30 minutes to dissolve any mineral deposits. After soaking, use a toothbrush to scrub the screen and remove any remaining buildup. Rinse the aerator thoroughly before reattaching it to the faucet.
Baking Soda Paste: Tackling Stubborn Deposits
For particularly stubborn mineral deposits, a paste made from baking soda and water can provide the extra scrubbing power you need. To make the paste, simply mix a few tablespoons of baking soda with enough water to form a thick consistency. Apply the paste to the affected areas of the faucet and let it sit for 10-15 minutes. Then, use a soft cloth or toothbrush to scrub the deposits away. The mild abrasiveness of the baking soda helps break down the minerals without damaging the faucet’s finish.
Lemon Juice: A Natural Acidic Solution
Lemon juice is another natural option for removing mineral deposits, thanks to its citric acid content. To use lemon juice, cut a lemon in half and rub it directly onto the affected areas of the faucet. The acidity of the lemon juice helps dissolve the minerals, making it easier to wipe them away. For particularly tough buildup, you can apply lemon juice to a cloth and let it sit on the faucet for a few minutes before scrubbing. Rinse the faucet with warm water and dry it thoroughly to prevent water spots.
Preventing Future Buildup: Regular Maintenance Tips
Once you’ve removed the mineral deposits, it’s important to take steps to prevent future buildup. Regularly wiping down your faucets with a soft cloth after each use can help prevent water spots and mineral deposits from forming. If you live in an area with hard water, consider installing a water softener to reduce the mineral content in your water. Additionally, make it a habit to clean your faucets with vinegar or lemon juice every few weeks to keep them looking their best and functioning properly.
Polishing and Protecting: Keeping Your Faucets Shiny and Spot-Free
After you’ve cleaned your bathroom faucets and removed any stubborn stains or mineral deposits, the next step is to polish and protect them to maintain their shine and prevent future buildup. Polishing not only enhances the appearance of your faucets but also adds a layer of protection against water spots and tarnish. Here are some tips and techniques for polishing and protecting your faucets to keep them looking shiny and new.
Polishing with Microfiber Towels: The Key to a Streak-Free Shine
One of the simplest and most effective ways to polish your faucets is by using a microfiber towel. These towels are designed to pick up dust, water spots, and fingerprints without leaving behind lint or streaks. After cleaning your faucet, take a dry microfiber towel and gently buff the surface in a circular motion. This will enhance the faucet’s shine and remove any remaining water spots. I always keep a few microfiber towels on hand for this purpose, as they’re an easy and effective way to maintain a polished look.
Olive Oil: A Natural Polish for Extra Shine
If you’re looking for a natural way to add shine to your faucets, olive oil is a great option. After cleaning and drying the faucet, apply a small amount of olive oil to a soft cloth and gently rub it onto the surface of the faucet. The oil not only adds a beautiful shine but also helps protect the finish by repelling water and preventing water spots from forming. Olive oil works particularly well on stainless steel and bronze finishes, but it can be used on most faucet materials for a quick and easy polish.
Commercial Polishing Products: Choosing the Right One
If you prefer using a commercial product for polishing your faucets, there are plenty of options available. I recommend choosing a product that’s specifically designed for the type of finish on your faucet. For example, stainless steel polishes are formulated to remove smudges and fingerprints while adding a protective layer to prevent future spots. Brass and bronze polishes are designed to restore the rich color and luster of these materials. Always follow the manufacturer’s instructions when using commercial polishes, and test the product on a small, inconspicuous area first to ensure it doesn’t damage the finish.
Applying a Protective Wax: Long-Term Protection Against Tarnish
For faucets made of brass, bronze, or other tarnish-prone materials, applying a protective wax can help preserve the finish and prevent tarnish from developing. After cleaning and polishing the faucet, use a soft cloth to apply a thin layer of wax, such as carnauba wax or a specialized metal wax, to the surface. Let the wax sit for a few minutes before buffing it off with a clean cloth. The wax creates a barrier that protects the faucet from moisture and air, reducing the chances of tarnish forming over time.
Preventing Water Spots: Regular Maintenance Tips
Water spots can quickly dull the shine of your faucets, especially in areas with hard water. To prevent water spots, make it a habit to wipe down your faucets with a soft cloth after each use. This simple step removes any water droplets before they have a chance to dry and leave spots behind. Additionally, you can periodically apply a water-repellent product, such as a silicone-based spray, to the faucet to help prevent water spots from forming. Just be sure to choose a product that’s safe for your faucet’s finish.
Regular Polishing Routine: Keeping Your Faucets Looking Their Best
To keep your faucets looking shiny and new, I recommend establishing a regular polishing routine. Depending on the finish and how often the faucet is used, you may want to polish it every week or two. Regular polishing not only maintains the faucet’s appearance but also helps protect it from damage and buildup. By incorporating polishing into your regular cleaning routine, you’ll ensure that your faucets stay spot-free and retain their original luster for years to come.
Common Mistakes to Avoid When Cleaning Old Bathroom Faucets
Cleaning old bathroom faucets may seem straightforward, but several common mistakes can lead to damage or less-than-perfect results. To ensure your faucets remain in good condition and look their best, it’s important to be aware of these pitfalls and take steps to avoid them. In this section, I’ll highlight some of the most common mistakes people make when cleaning faucets and how to steer clear of them.
Using Abrasive Cleaners: Scratches and Damage
One of the biggest mistakes you can make when cleaning faucets is using abrasive cleaners or scrubbers. These can easily scratch the surface of the faucet, particularly if it’s made of chrome, stainless steel, or gold-plated materials. I always recommend using mild dish soap, white vinegar, or a baking soda paste as your primary cleaning solution. When scrubbing is necessary, opt for a soft cloth or a non-abrasive scrub pad to protect the finish from scratches and damage.
Ignoring the Manufacturer’s Instructions: Risking the Finish
Each type of faucet finish requires specific care, and ignoring the manufacturer’s instructions can result in damage to the finish. For example, using acidic cleaners on brushed nickel or gold-plated faucets can cause discoloration or tarnishing. Before cleaning your faucet, take the time to review any care instructions provided by the manufacturer. Following these guidelines ensures that you’re using the right products and techniques to maintain the faucet’s appearance and longevity.
Neglecting to Rinse and Dry: Leaving Behind Residue
After cleaning your faucet, it’s essential to rinse off any cleaning solution thoroughly and dry the faucet completely. Leaving behind residue from soap, vinegar, or other cleaners can lead to streaks, water spots, or even damage to the finish over time. I always make it a point to rinse the faucet with warm water after cleaning and then wipe it dry with a soft, lint-free cloth. This simple step helps ensure that the faucet remains spot-free and shiny.
Overlooking Hard-to-Reach Areas: Missing Buildup
When cleaning faucets, it’s easy to focus on the most visible parts and overlook hard-to-reach areas, such as around the handles, spout, and where the faucet meets the sink. These areas can accumulate dirt, grime, and mineral deposits over time, leading to unsightly buildup. To avoid this mistake, I use a soft-bristled toothbrush to clean around these tight spots, ensuring that every part of the faucet is thoroughly cleaned and free from buildup.
Not Protecting Delicate Finishes: Risking Tarnish and Discoloration
Some faucet finishes, such as brass or bronze, are more delicate and prone to tarnish or discoloration if not properly protected. Using harsh chemicals or failing to apply a protective wax can lead to a dull or damaged finish. I recommend using gentle, natural cleaning solutions like vinegar and baking soda for these types of faucets, followed by a protective wax application to preserve the finish and prevent tarnish.
Skipping Regular Maintenance: Allowing Buildup to Accumulate
Finally, one of the most common mistakes is neglecting regular maintenance, allowing grime, mineral deposits, and water spots to accumulate over time. Regular maintenance, such as wiping down the faucet after each use and doing a deeper clean every few weeks, helps prevent buildup and keeps the faucet looking its best. By establishing a routine cleaning schedule, you can avoid the need for more intensive cleaning efforts and extend the life of your faucet.
Final Thoughts
Cleaning and maintaining old bathroom faucets can seem like a daunting task, but with the right knowledge, tools, and techniques, it becomes a manageable and even rewarding project. Understanding the materials and finishes of your faucets, using natural cleaning solutions, and avoiding common mistakes all contribute to keeping your faucets in top condition. Whether you’re dealing with stubborn stains, mineral deposits, or simply trying to restore shine, these tips and strategies will help you achieve beautiful, spot-free results. By incorporating regular cleaning and maintenance into your routine, you’ll ensure that your bathroom faucets remain functional and attractive for years to come.
How to Remove and Install a Bathroom Faucet
How To Install a Bathroom Faucet
Related Posts:
- Best Single Handle Bathroom Faucet
- Kingston Brass Heritage Bathroom Faucet
- Chrome And Porcelain Bathroom Faucets
- Pfister Pasadena Bathroom Faucet Reviews
- Fix Leaky Bathroom Faucet Single Handle
- Inexpensive Bathroom Faucets
- 4 Minispread Bathroom Faucets
- Pump Style Bathroom Faucet
- Commercial Grade Bathroom Faucets
- Bathroom Faucet Leaks When Turned On

