The Basics of DIY Reglazing Bathroom Tile
Reglazing bathroom tile is a cost-effective way to refresh the look of your bathroom without the need for a full renovation. However, before diving into this DIY project, it’s essential to understand the basics of reglazing and what you’ll need to accomplish the task. From preparation to application, here’s what you need to know about DIY reglazing bathroom tile.
- Surface Preparation: The key to successful tile reglazing is proper surface preparation. This involves thoroughly cleaning the tiles to remove any dirt, grime, or soap scum. Use a mild abrasive cleaner and scrubbing brush to ensure the tiles are free from any residues that could affect the adhesion of the reglazing material. Additionally, repair any cracks or chips in the tiles and allow them to dry completely before proceeding with the reglazing process.
- Ventilation and Safety Precautions: Reglazing products often contain harsh chemicals that can emit strong fumes, so it’s crucial to ensure proper ventilation in the bathroom area. Open windows and doors, and use a fan to circulate fresh air during the reglazing process. Additionally, wear appropriate personal protective equipment, such as gloves and a mask, to protect yourself from exposure to the chemicals.
- Choosing the Right Reglazing Product: There are various reglazing products available on the market, including epoxy, acrylic, and urethane-based coatings. Each type of product has its own application process and drying time, so it’s essential to choose the right one for your specific needs. Consider factors such as durability, ease of application, and color options when selecting a reglazing product for your bathroom tile.
- Application Techniques: Proper application technique is critical for achieving a smooth and even finish when reglazing bathroom tile. Start by applying a thin coat of reglazing material using a high-quality brush or roller, ensuring even coverage across the entire surface of the tiles. Avoid applying too thick of a coat, as this can lead to drips and uneven drying. Allow the first coat to dry completely before applying additional coats as needed to achieve the desired finish.
- Curing and Drying Time: Once the reglazing material has been applied, it’s essential to allow sufficient time for curing and drying. This typically involves waiting at least 24 hours before exposing the tiles to water or moisture. During this time, avoid using the bathroom or placing any objects on the reglazed tiles to prevent damage to the finish. Following the recommended curing and drying time ensures the longevity and durability of the reglazing.
- Maintenance and Care: Proper maintenance and care are essential for preserving the appearance and longevity of reglazed bathroom tile. Avoid using harsh abrasive cleaners or scrubbing brushes that can damage the finish. Instead, clean the tiles regularly with a mild soap and water solution and a soft sponge or cloth. Additionally, be mindful of any objects or chemicals that may come into contact with the reglazed tiles to prevent scratches or damage to the finish.
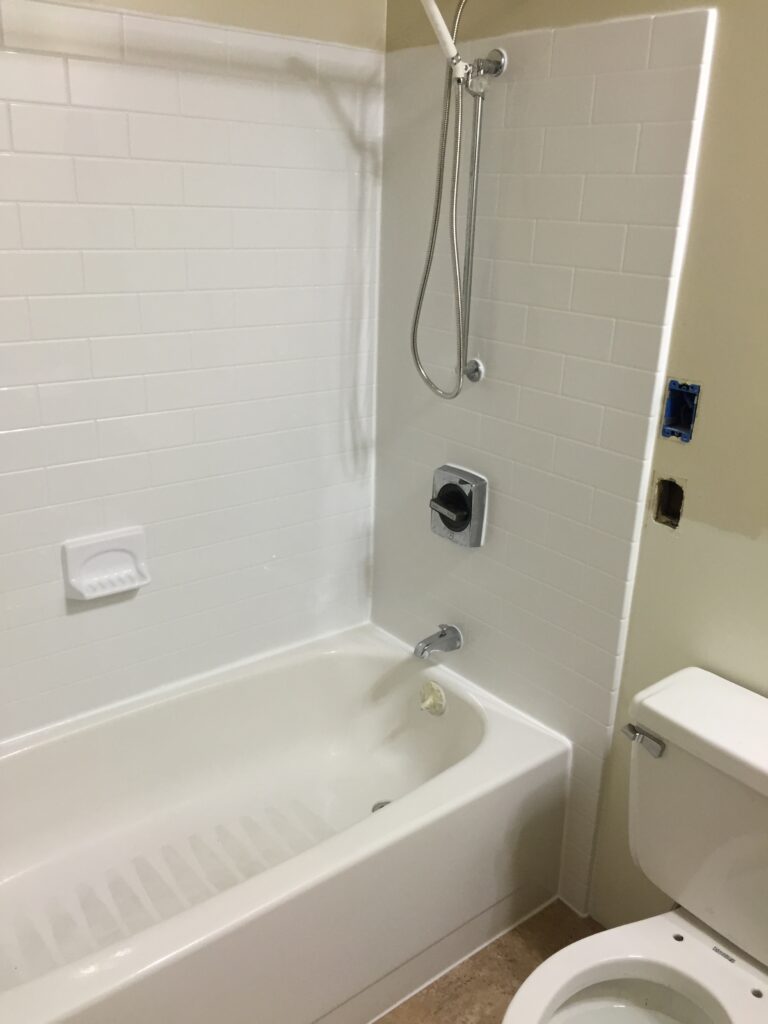
Step-by-Step Guide: How to Reglaze Bathroom Tile Like a Pro
Reglazing bathroom tile can transform the look of your bathroom without the need for a costly renovation. With the right tools, materials, and techniques, you can achieve professional-looking results with a DIY approach. Follow this step-by-step guide to learn how to reglaze bathroom tile like a pro and give your bathroom a fresh new look.
Gather Your Materials and Tools: Before starting the reglazing process, gather all the necessary materials and tools. You’ll need a mild abrasive cleaner, scrubbing brush, masking tape, drop cloths, reglazing product, high-quality brush or roller, gloves, mask, and proper ventilation. Ensure that you have everything you need on hand before beginning the project to avoid interruptions during the process.
Prepare the Surface: Start by thoroughly cleaning the tiles to remove any dirt, grime, or soap scum. Use a mild abrasive cleaner and scrubbing brush to scrub the tiles and grout lines, ensuring that the surface is clean and free from any residues. Rinse the tiles with water and allow them to dry completely before proceeding with the reglazing process.
Mask Off Surrounding Areas: Use masking tape to mask off any areas around the tiles that you don’t want to be reglazed, such as the bathtub, sink, or countertops. Lay down drop cloths to protect the surrounding surfaces from drips or spills during the reglazing process.
Apply the Reglazing Product: Stir the reglazing product thoroughly to ensure an even consistency. Using a high-quality brush or roller, apply a thin coat of reglazing material to the tiles, starting from the top and working your way down. Ensure even coverage across the entire surface of the tiles, avoiding applying too thick of a coat to prevent drips or uneven drying.
Allow for Drying Time: Once the reglazing material has been applied, allow it to dry according to the manufacturer’s instructions. This typically involves waiting at least 24 hours before exposing the tiles to water or moisture. During this time, ensure proper ventilation in the bathroom area to allow the reglazing material to cure properly.
Apply Additional Coats (if necessary): Depending on the desired finish and the condition of the tiles, you may need to apply additional coats of reglazing material. Allow each coat to dry completely before applying the next coat, following the same application process as before.
Remove Masking Tape and Clean Up: Once the reglazing material has dried completely, carefully remove the masking tape from the surrounding areas. Use a mild soap and water solution to clean up any drips or spills, being careful not to disturb the reglazed tiles.
Final Touches: Once the reglazing process is complete and the tiles have dried thoroughly, inspect the surface for any imperfections or areas that may need touch-ups. Use fine-grit sandpaper to smooth out any rough spots or uneven areas, then apply a final coat of reglazing material as needed to achieve the desired finish.
Choosing the Right Materials and Tools for DIY Tile Reglazing
When embarking on a DIY tile reglazing project, selecting the right materials and tools is crucial for achieving professional-looking results. From cleaning agents to reglazing products and application tools, each component plays a significant role in the success of the project. Here’s a guide to help you choose the right materials and tools for DIY tile reglazing.
Cleaning Agents: Before reglazing your bathroom tiles, it’s essential to thoroughly clean the surface to remove any dirt, grime, or soap scum. Choose a mild abrasive cleaner specifically formulated for cleaning tiles, as harsh chemicals can affect the adhesion of the reglazing product. Additionally, gather scrubbing brushes and sponges to assist with the cleaning process.
Reglazing Products: There are various reglazing products available on the market, including epoxy, acrylic, and urethane-based coatings. Each type of product has its application process and drying time, so it’s crucial to choose the right one for your specific needs. Consider factors such as durability, ease of application, and color options when selecting a reglazing product for your bathroom tiles.
Application Tools: The choice of application tools can significantly impact the outcome of your DIY tile reglazing project. High-quality brushes or rollers are essential for achieving smooth and even coverage of the reglazing material. Opt for brushes or rollers specifically designed for use with reglazing products to ensure optimal results. Additionally, consider using masking tape to mask off surrounding areas and drop cloths to protect surfaces from drips or spills during the application process.
Personal Protective Equipment (PPE): Reglazing products often contain harsh chemicals that can emit strong fumes, so it’s crucial to prioritize safety by wearing appropriate personal protective equipment (PPE). Gloves and masks are essential for protecting your skin and respiratory system from exposure to chemicals. Additionally, ensure proper ventilation in the bathroom area by opening windows and doors and using fans to circulate fresh air during the reglazing process.
Surface Preparation Tools: Proper surface preparation is key to the success of your DIY tile reglazing project. Gather tools such as sandpaper or sanding blocks to smooth out any rough spots or imperfections on the tiles. Additionally, repair any cracks or chips in the tiles using epoxy or filler compounds and allow them to dry completely before proceeding with the reglazing process.
Finishing Touches: Once the reglazing process is complete, you may need to apply finishing touches to achieve the desired result. Fine-grit sandpaper can be used to smooth out any rough spots or uneven areas on the reglazed tiles. Additionally, consider applying a clear sealant or topcoat to protect the reglazing material and enhance its durability.
Tips and Tricks for Successful DIY Bathroom Tile Reglazing
Reglazing bathroom tile can be a rewarding DIY project that refreshes the look of your bathroom without the need for a full renovation. However, to achieve professional-looking results, it’s essential to follow some tips and tricks that will help you navigate the reglazing process successfully. From surface preparation to application techniques, here are some tips and tricks for successful DIY bathroom tile reglazing.
Thorough Surface Preparation: Proper surface preparation is crucial for the success of your DIY bathroom tile reglazing project. Take the time to thoroughly clean the tiles to remove any dirt, grime, or soap scum using a mild abrasive cleaner and scrubbing brush. Additionally, repair any cracks or chips in the tiles and smooth out any rough spots or imperfections using sandpaper or sanding blocks. Proper surface preparation ensures optimal adhesion of the reglazing material and a smooth, even finish.
Test the Reglazing Product: Before applying the reglazing product to your bathroom tiles, it’s a good idea to test it on a small, inconspicuous area to ensure compatibility and desired results. This allows you to assess the color, texture, and finish of the reglazing product before committing to the entire project. If the test results are satisfactory, proceed with the reglazing process according to the manufacturer’s instructions.
Apply Thin, Even Coats: When applying the reglazing product to your bathroom tiles, aim to achieve thin, even coats for optimal results. Use a high-quality brush or roller to apply the reglazing material, starting from the top and working your way down. Avoid applying too thick of a coat, as this can lead to drips, uneven drying, and a less-than-desirable finish. Take your time and apply multiple thin coats as needed to achieve the desired coverage and finish.
Allow Sufficient Drying Time: Proper drying time is essential for the success of your DIY bathroom tile reglazing project. Allow each coat of reglazing material to dry completely according to the manufacturer’s instructions before applying additional coats or exposing the tiles to water or moisture. Rushing the drying process can compromise the adhesion and durability of the reglazing material, leading to unsatisfactory results.
Practice Proper Ventilation: Reglazing products often contain harsh chemicals that can emit strong fumes, so it’s crucial to ensure proper ventilation in the bathroom area during the reglazing process. Open windows and doors, and use fans to circulate fresh air and remove fumes from the space. Additionally, wear appropriate personal protective equipment, such as gloves and a mask, to protect yourself from exposure to chemicals.
Practice Patience and Attention to Detail: DIY bathroom tile reglazing requires patience and attention to detail to achieve professional-looking results. Take your time during the surface preparation and application process, ensuring thorough cleaning and even coverage of the reglazing material. Pay attention to details such as edges, corners, and grout lines, ensuring that they are properly coated and finished for a seamless look.
Pros and Cons of DIY Reglazing Bathroom Tile
DIY reglazing bathroom tile can be an attractive option for homeowners looking to refresh the look of their bathroom without the cost and hassle of a full renovation. However, like any DIY project, there are both pros and cons to consider before embarking on the reglazing process. Understanding the advantages and disadvantages will help you determine if DIY reglazing bathroom tile is worth the effort for your specific needs.
Pros of DIY Reglazing Bathroom Tile:
Cost-Effective: One of the primary advantages of DIY reglazing bathroom tile is its cost-effectiveness compared to a full renovation. Reglazing materials and tools are generally more affordable than purchasing new tiles and hiring professionals for installation, making it a budget-friendly option for homeowners on a tight budget.
Quick and Convenient: DIY reglazing bathroom tile is a relatively quick and convenient process that can be completed in a weekend or less, depending on the size of the bathroom and the condition of the tiles. With the right materials and tools, you can achieve professional-looking results without the need for extensive downtime or disruption to your daily routine.
Customizable: DIY reglazing bathroom tile offers a high degree of customization, allowing you to choose from a wide range of colors, finishes, and textures to achieve the desired look for your bathroom. Whether you prefer a sleek modern finish or a classic vintage style, there are reglazing products available to suit your aesthetic preferences.
Eco-Friendly: Reglazing bathroom tile is an eco-friendly option that helps reduce waste by extending the lifespan of existing tiles rather than replacing them with new ones. By opting for DIY reglazing, you can contribute to sustainability and reduce your environmental footprint.
Adds Value to Your Home: Refreshing the look of your bathroom with DIY reglazing can enhance the overall value and appeal of your home. A well-maintained and updated bathroom is a desirable feature for potential buyers and can increase the resale value of your property.
Cons of DIY Reglazing Bathroom Tile:
Labor-Intensive: DIY reglazing bathroom tile requires careful preparation and application, which can be labor-intensive and time-consuming. Surface preparation, multiple coats of reglazing material, and proper drying time all contribute to the overall workload of the project.
Skill and Experience Required: Achieving professional-looking results with DIY reglazing bathroom tile requires a certain level of skill and experience. Proper surface preparation, application techniques, and attention to detail are essential for a successful outcome, which may be challenging for inexperienced DIYers.
Potential for Imperfections: Despite careful preparation and application, DIY reglazing bathroom tile may still result in imperfections such as drips, streaks, or uneven coverage. Achieving a smooth and even finish requires practice and attention to detail, and some DIYers may find it challenging to achieve flawless results.
Limited Durability: While reglazing can refresh the appearance of bathroom tiles, it may not provide the same level of durability and longevity as replacing them with new tiles. Over time, reglazed tiles may be prone to chipping, peeling, or discoloration, especially in high-traffic areas such as showers or tubs.
Health and Safety Concerns: DIY reglazing bathroom tile involves working with harsh chemicals and fumes, which can pose health and safety risks if proper precautions are not taken. It’s essential to wear appropriate personal protective equipment, ensure proper ventilation, and follow the manufacturer’s instructions to minimize exposure to chemicals and fumes.
How to Reglaze A Bathtub and Tile Surround – Daly Digs
Before/After: A Perfectionistu0027s $1,000 Bathroom Overhaul in
How Long Does Tile Reglazing Last in Cranford, NJ?
Painting a Bathtub (DIY results vs. Professional Reglazing)
DIY Bathtub Refinishing – Miracle Method
DIY Tub and Shower Finishing vs. Professional Finishing
Bath Renovation and Refinishing Services NYC – Supreme Bath
Ceramic Tile Reglazing- DIY Network
Related Posts:
