Understanding the Importance of Properly Finished Bathroom Tile Edges
Properly finishing bathroom tile edges is a crucial step in any tile installation project. Not only does it enhance the overall look and aesthetic appeal of the bathroom, but it also serves functional purposes. Let’s discuss the importance of properly finished bathroom tile edges and why it should not be overlooked.
- Preventing Water Damage: One of the main reasons why properly finished tile edges are important is to prevent water damage. Bathrooms are prone to moisture and water splashes, which can seep into the edges of the tiles if not protected. This can lead to mold growth, rotting of the underlying structure, and costly repairs. Properly finished edges act as a barrier, preventing water from seeping into the walls or floor.
- Enhancing Durability: Bathroom tiles are exposed to constant wear and tear, including foot traffic, cleaning products, and moisture. Without proper edge finishing, the tiles are more susceptible to chipping, cracking, and breaking. By ensuring the edges are properly finished, you increase the overall durability and lifespan of the tiles, reducing the need for frequent replacements.
- Creating a Polished and Professional Look: A well-finished bathroom tile edge adds a polished and professional look to the overall bathroom design. It gives a clean and cohesive appearance, making the bathroom feel more luxurious and well-maintained. Whether you opt for a simple bullnose edge or a more decorative trim, properly finishing the edges elevates the aesthetic appeal of the entire space.
- Safety and Comfort: Unfinished tile edges can be sharp and pose a safety hazard, especially in high-traffic areas like the bathroom. Properly finished edges provide a smooth and rounded surface, reducing the risk of accidental cuts or injuries. Additionally, finished edges also make it more comfortable to lean against or rest your arms on while using the bathroom countertop or bathtub.
- Easy Maintenance and Cleaning: Finished tile edges are easier to clean and maintain compared to rough or unfinished edges. The smooth surface prevents dirt, grime, and soap scum from accumulating in the crevices, making it easier to wipe clean. It also minimizes the chances of discoloration or staining over time, ensuring your bathroom tiles look fresh and pristine for longer.
Essential Tools and Materials for Finishing Bathroom Tile Edges
When it comes to finishing bathroom tile edges, having the right tools and materials is crucial for achieving a professional and polished look. Let’s explore the essential tools and materials required to properly finish bathroom tile edges.
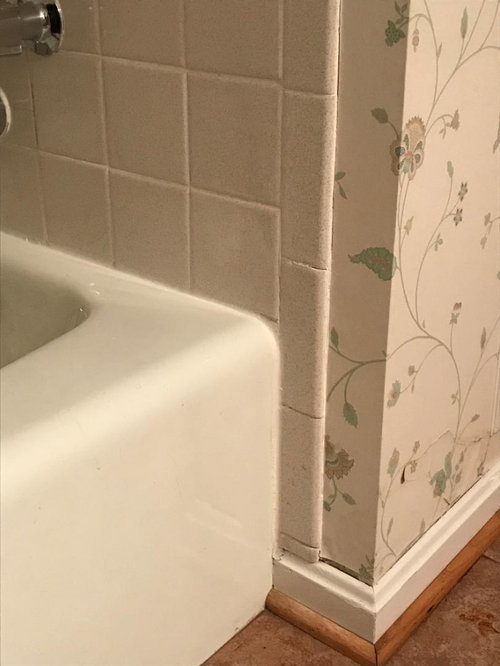
Tile Trim: Tile trim is a must-have material for finishing bathroom tile edges. It is available in various shapes, sizes, and finishes to suit different tile styles and design preferences. Common types of tile trim include bullnose trim, corner trim, and edge trim. Choose a trim that complements your tile choice and provides a seamless transition between the tile and the adjacent surface.
Tile Adhesive: A high-quality tile adhesive is essential for securing the tile trim in place. Opt for a waterproof adhesive that is specifically designed for bathroom use. Make sure to follow the manufacturer’s instructions for proper application and drying time.
Tile Saw or Tile Nippers: Depending on the type of tile trim you choose, you may need a tile saw or tile nippers to cut the trim to the desired length or shape. A tile saw is ideal for straight cuts, while tile nippers are useful for making curved or irregular cuts. Always wear appropriate safety gear when using these tools.
Measuring Tape and Pencil: Accurate measurements are crucial when cutting and installing tile trim. A measuring tape and pencil are essential tools for marking the trim and ensuring precise cuts. Take measurements carefully to avoid any wastage or incorrect cuts.
Notched Trowel: A notched trowel is used to apply tile adhesive evenly on the back of the tile trim. The size of the notches on the trowel should correspond to the recommended adhesive coverage for the size and type of trim being used. A notched trowel ensures proper adhesion and prevents air pockets or uneven bonding.
Grout: Grout is used to fill the gaps between the tiles and the tile trim. It helps to secure the tiles in place and provides a finished look. Choose a grout color that complements your tile and trim to achieve a cohesive and seamless appearance.
Grout Float: A grout float is a tool used to apply and spread grout over the tile surface. It helps to ensure even distribution and smooth application of the grout. Use the float at a 45-degree angle to push the grout into the gaps and remove any excess.
Sponge and Grout Sealer: A sponge is used to wipe away excess grout and clean the tile surface after grouting. It is important to remove any grout haze before it dries to achieve a clean and polished finish. Additionally, applying a grout sealer after the grout has cured helps to protect the grout from stains and discoloration.
Step-by-Step Guide to Finishing Bathroom Tile Edges for a Polished Look
Finishing the edges of bathroom tiles is crucial for achieving a polished and professional look in your bathroom. We will provide you with a step-by-step guide to properly finish bathroom tile edges and achieve a seamless and attractive result.
Measure and Cut the Tile Trim: Begin by measuring the length of the tile edge that needs to be finished. Use a measuring tape and pencil to mark the trim accordingly. If necessary, use a tile saw or tile nippers to cut the tile trim to the desired length and shape. Ensure the cuts are clean and precise.
Apply Tile Adhesive: Use a notched trowel to evenly apply tile adhesive on the back of the tile trim. The size of the notches should correspond to the recommended adhesive coverage for the size and type of trim being used. Make sure to spread the adhesive evenly to ensure proper adhesion.
Position and Press the Tile Trim: Carefully position the tile trim along the edge of the tile, ensuring it aligns perfectly. Press the trim firmly into place, applying even pressure to ensure it adheres securely. Use a level or straightedge to ensure the trim is straight and aligned with the adjacent tiles.
Clean Excess Adhesive: Wipe away any excess adhesive that may have squeezed out from under the tile trim. Use a damp cloth or sponge to clean the surface and edges of the tiles. It’s important to remove the excess adhesive before it dries to achieve a clean and professional finish.
Allow the Adhesive to Dry: Follow the manufacturer’s instructions to determine the drying time for the tile adhesive. It is crucial to allow the adhesive to fully dry and cure before proceeding with grouting. This ensures that the tile trim is securely bonded to the tiles and prevents any movement or displacement during grouting.
Prepare and Apply Grout: Once the adhesive is completely dry, prepare the grout according to the manufacturer’s instructions. Use a grout float to apply the grout over the tile surface, ensuring it fills the gaps between the tiles and the tile trim. Work the grout into the gaps at a 45-degree angle, removing any excess grout.
Clean and Seal the Grout: After allowing the grout to set for the recommended time, use a damp sponge to clean the tile surface and remove any grout haze. Be careful not to disturb the grout lines. Once the grout is fully cured, apply a grout sealer to protect the grout from stains and discoloration.
Final Touches: Inspect the finished tile edges for any imperfections or areas that may require touch-ups. If necessary, use a small brush or touch-up paint to correct any issues and ensure a seamless and polished look.
Creative and Stylish Options for Finishing Bathroom Tile Edges
When it comes to finishing bathroom tile edges, there are various creative and stylish options available that can elevate the overall look of your bathroom. Below are some innovative and decorative ways to finish bathroom tile edges, adding a unique touch to your space.
Mosaic Border: Create a stunning mosaic border along the edges of your bathroom tiles. Mosaic tiles come in a variety of colors, shapes, and materials, allowing you to customize the design to match your bathroom decor. Use mosaic tiles to create a border that complements the color scheme of your tiles or adds a pop of contrasting color for a bold statement.
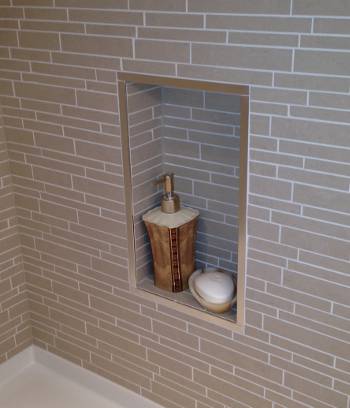
Metal Trim: Incorporate metal trim into your bathroom tile design for a sleek and contemporary finish. Metal trims are available in different finishes such as stainless steel, brushed nickel, or bronze, adding a touch of elegance to your bathroom. Choose a trim profile that suits your style, whether it’s a simple straight edge or a more decorative option.
Glass Accent Tiles: Add a touch of sophistication by using glass accent tiles to finish the edges of your bathroom tiles. Glass tiles reflect light, creating a beautiful shimmering effect in your bathroom. Choose accent tiles in complementary colors or patterns to create a focal point along the edges. You can also mix and match glass tiles with other materials for a unique and personalized look.
Bullnose Tiles: Bullnose tiles are a classic and timeless option for finishing bathroom tile edges. These tiles have one rounded edge, providing a smooth and finished appearance. You can find bullnose tiles that match your main tiles in terms of color, material, and finish, ensuring a seamless transition between the tile and the edge.
Wood Trim: For a warm and natural look, consider using wood trim to finish your bathroom tile edges. Wood trim adds a touch of warmth and texture to the space. Choose a wood species that is suitable for bathroom environments and ensure proper sealing to protect it from moisture. Wood trim can be stained or painted to match your desired color scheme.
Decorative Tile Borders: Incorporate decorative tile borders to add visual interest and a decorative touch to your bathroom tile edges. These borders can feature intricate patterns, geometric designs, or artistic motifs. Choose a border that complements your tile style and adds a unique focal point to your bathroom design.
Custom Edge Profiles: If you want to go the extra mile in customization, consider creating custom edge profiles for your bathroom tile edges. This can be achieved by using a tile saw or router to shape the edges according to your desired design. Custom edge profiles can range from simple beveled edges to more intricate designs, allowing you to create a truly personalized look.
Troubleshooting Common Challenges When Finishing Bathroom Tile Edges
Finishing bathroom tile edges may come with its fair share of challenges. However, with the right knowledge and troubleshooting techniques, you can overcome these obstacles and achieve a professional and polished look. We will discuss some common challenges that arise when finishing bathroom tile edges and provide solutions to tackle them effectively.
Uneven Tile Trim: One of the common issues faced when finishing bathroom tile edges is achieving an even and consistent tile trim. To address this, ensure that you measure and cut the tile trim accurately. Use a level or straightedge to check for any unevenness before applying the adhesive. If you notice any gaps or inconsistencies, adjust the position of the tile trim accordingly or trim the edges as needed. Taking your time during the installation process will help you achieve a seamless and level finish.
Adhesive Excess or Insufficient: Another challenge is controlling the amount of adhesive applied to the tile trim. Applying too much adhesive can result in excess squeezing out from under the trim, which can be difficult to clean and may affect the overall appearance. On the other hand, insufficient adhesive can lead to poor adhesion and potential loosening of the tile trim. To avoid these issues, follow the manufacturer’s instructions for the recommended amount of adhesive and use a notched trowel to apply it evenly on the back of the trim. Clean any excess adhesive immediately with a damp cloth or sponge before it dries.
Grout Staining or Discoloration: Staining or discoloration of the grout is a common concern when finishing bathroom tile edges. To prevent this, ensure that you clean the tiles and trim thoroughly before applying the grout. Use a grout float at a 45-degree angle to push the grout into the gaps, ensuring complete coverage. After allowing the grout to set for the recommended time, gently wipe away any excess grout with a damp sponge. Be careful not to remove too much grout, as this can cause the edges to become uneven. If staining or discoloration occurs after the grout has dried, you can use a grout cleaner or sealer to restore the color and protect the grout.
Rough or Sharp Edges: Sometimes, the finished tile edges may still feel rough or have sharp edges. To address this, carefully inspect the edges and use sandpaper or a tile file to smooth out any rough areas. Be cautious when filing the edges, ensuring that you maintain the desired shape and profile of the trim. Sanding or filing the edges will provide a smooth and comfortable finish, reducing the risk of accidental cuts or injuries.
Tile Trim Misalignment: Misalignment of the tile trim can occur during installation, resulting in an uneven or crooked appearance. To rectify this issue, carefully remove the misaligned trim and clean off any adhesive residue. Reapply adhesive to the back of the trim and reposition it, ensuring proper alignment and levelness. Use a level or straightedge to double-check the placement before firmly pressing the trim into place. Taking the time to align the trim correctly will ensure a visually pleasing and cohesive look.
Ways to Finish Shower Tile Edges for a Professional Look
How to Finish the Tile Edge in a Shower With No Bullnose
How to Finish Tile With Metal Edging – Dans le Lakehouse
How To Make Exposed Tile Edges Look Finished?
5 Ways to Finish Shower Tile Edges for a Professional Look u2014 DESIGNED
My experience tiling a shower for the first time
Install Shower Tile Edging Trim – Quick and Easy!
Use Tile-Edging Trim For A Design Punch u2013 Rubenstein Supply Company
Easy Ways to Finish Tile Edges MSI Blog
Related Posts:
