Identifying the Source of the Leak
A leaky Delta bathroom faucet can be a frustrating problem, but before you can fix it, you need to identify the source of the leak. Here are some common issues to look for when diagnosing a leaky Delta faucet:
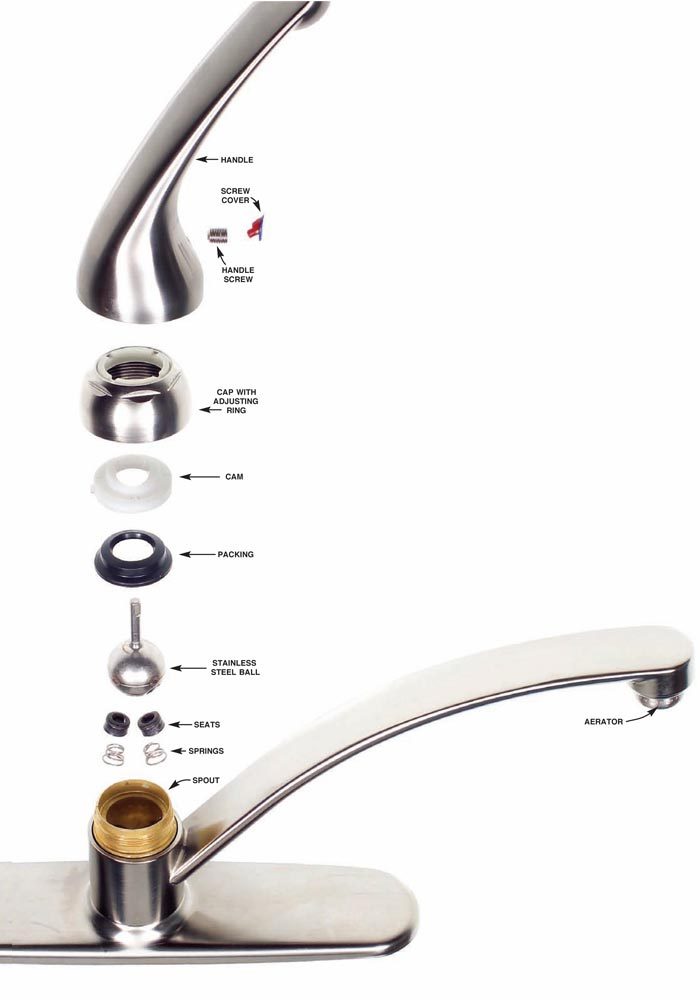
- Dripping from the Spout: If water is dripping continuously from the spout of your Delta bathroom faucet, the most likely culprit is a worn-out or damaged cartridge. Over time, the cartridge can become worn or develop cracks, allowing water to leak through even when the faucet is turned off.
- Leaks from the Base: If you notice water pooling around the base of the faucet when it’s turned on, the problem may be a loose or damaged O-ring or seal. These seals are designed to prevent water from leaking out around the base of the faucet, but they can degrade over time, leading to leaks.
- Spraying or Splashing Water: Sometimes, a Delta faucet may develop issues with water flow, causing it to spray or splash water when turned on. This could be due to a buildup of sediment or mineral deposits in the aerator or other components of the faucet, affecting the flow of water.
- Leaks from the Handles: Leaks from the handles of a Delta faucet typically indicate a problem with the handle seals or O-rings. These seals can wear out over time, allowing water to seep out around the handles when the faucet is turned on.
- Strange Noises: If you hear strange noises like whistling, rattling, or banging when you turn on your Delta faucet, it could be a sign of water pressure issues or loose components inside the faucet.

Gathering the Necessary Tools and Materials
Before you begin repairing your leaky Delta bathroom faucet, it’s essential to gather all the necessary tools and materials. Here’s what you’ll need to have on hand:
Adjustable Wrench: An adjustable wrench will be necessary for loosening and tightening various components of the faucet, such as nuts and bolts.
Phillips and Flathead Screwdrivers: Depending on the type of Delta faucet you have, you may need both Phillips and flathead screwdrivers to remove screws and access internal components.
Replacement Cartridge or Parts: If the issue with your Delta faucet stems from a worn-out or damaged cartridge, you’ll need to have a replacement cartridge on hand. Make sure to purchase the correct cartridge model for your faucet.
O-Rings and Seals: If the leak is coming from around the base of the faucet or the handles, you may need to replace the O-rings or seals. Have a variety of sizes on hand to ensure you have the right fit.
Plumber’s Tape: Plumber’s tape, also known as Teflon tape, is essential for creating a watertight seal when reassembling the faucet components.
Cleaning Supplies: Depending on the condition of your faucet, you may need cleaning supplies such as vinegar, a soft brush, or a cloth to remove any built-up sediment or mineral deposits.
Flashlight: A flashlight can help illuminate hard-to-reach areas under the sink or inside the faucet housing.
Bucket or Towels: Have a bucket or towels on hand to catch any water that may leak out during the repair process, especially if you need to shut off the water supply to the faucet.
Step-by-Step Guide to Fixing a Leaky Delta Bathroom Faucet
Once you’ve identified the source of the leak and gathered the necessary tools and materials, it’s time to begin the repair process. Here’s a step-by-step guide to fixing a leaky Delta bathroom faucet:
Shut Off the Water: Before you start working on your faucet, turn off the water supply to the sink to prevent any accidents or water damage.
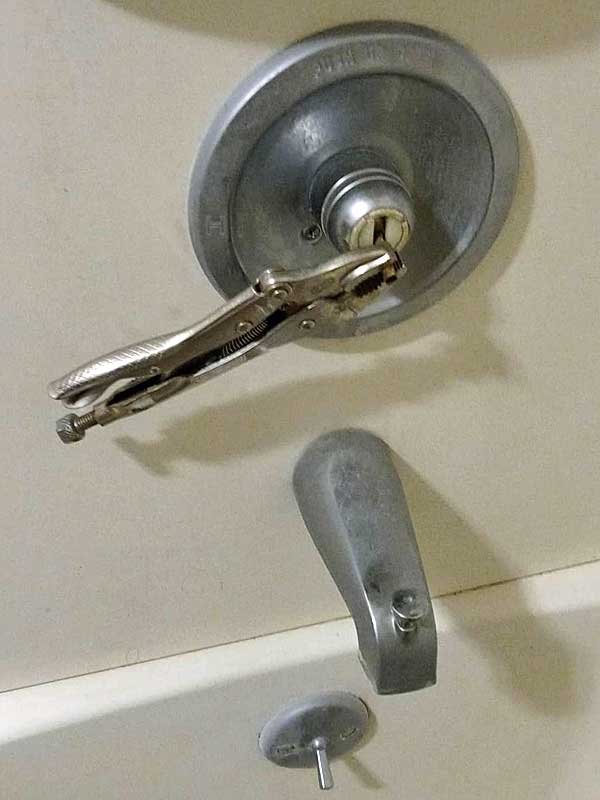
Remove the Handle: Use a screwdriver to remove the handle of the faucet, exposing the cartridge or other internal components.
Inspect the Cartridge: If the leak is coming from the spout of the faucet, inspect the cartridge for signs of damage or wear. If necessary, replace the cartridge with a new one, following the manufacturer’s instructions.
Replace Seals or O-Rings: If the leak is coming from around the base of the faucet or the handles, inspect the seals or O-rings for damage. Replace any worn-out or damaged seals with new ones, ensuring a tight seal to prevent leaks.
Clean Internal Components: Use vinegar or a cleaning solution to remove any built-up sediment or mineral deposits from the internal components of the faucet, such as the aerator or cartridge housing.
Reassemble the Faucet: Once you’ve made the necessary repairs and replaced any damaged parts, reassemble the faucet in the reverse order of how you disassembled it.
Test the Faucet: Turn the water supply back on and test the faucet to ensure that the leak has been fixed. Check for any signs of leaking or dripping, and make any adjustments as needed.
Check for Proper Functionality: Finally, check that the faucet is functioning correctly, with smooth water flow and no strange noises or issues. Make any final adjustments as necessary to ensure optimal performance.
Preventative Maintenance Tips
Preventative maintenance is key to keeping your Delta bathroom faucet leak-free and functioning smoothly for years to come. Here are some essential tips to help you maintain your faucet and prevent leaks:
Regular Cleaning: Make it a habit to clean your Delta bathroom faucet regularly to remove dirt, mineral deposits, and soap scum buildup. Use a mild soap and water solution and a soft cloth to wipe down the faucet’s surfaces, including the spout, handles, and aerator.
Check for Leaks: Periodically inspect your faucet for any signs of leaks, such as dripping water or water stains around the base of the faucet. Address any leaks promptly to prevent further damage and avoid wasting water.
Replace Worn-Out Parts: Over time, certain components of your Delta bathroom faucet may wear out and need to be replaced. Keep an eye on the condition of parts such as O-rings, valve seats, and cartridges, and replace them as needed to prevent leaks and maintain optimal performance.
Avoid Excessive Force: Avoid using excessive force when operating the handles or adjusting the faucet settings. Turning the handles too tightly can put a strain on the internal components of the faucet and lead to leaks over time. Use gentle, controlled movements to operate the faucet.
Protect Against Freezing: If you live in an area with cold temperatures, take steps to protect your Delta bathroom faucet against freezing during the winter months. Disconnect and drain outdoor hoses, and consider insulating exposed pipes to prevent freezing and potential leaks.
Schedule Professional Inspections: Consider scheduling periodic inspections by a professional plumber to check for any hidden leaks or underlying issues with your Delta bathroom faucet. A plumber can identify potential problems early on and recommend appropriate repairs or maintenance to keep your faucet in top condition.
When to Seek Professional Help
While many minor faucet repairs can be tackled as DIY projects, there are times when it’s best to leave the job to the professionals. Here are some signs that indicate you may need to seek professional help for your leaky Delta bathroom faucet:
Persistent Leaks: If you’ve attempted DIY repairs but the faucet continues to leak or the problem persists, it may be a sign of a more serious issue that requires professional attention. A plumber can diagnose the underlying cause of the leak and recommend appropriate repairs.
Complex Repairs: Some faucet repairs, such as replacing a damaged cartridge or repairing a corroded valve seat, can be complex and require specialized tools and expertise. If you’re not comfortable or confident in your ability to tackle these repairs, it’s best to hire a professional plumber who has the necessary skills and experience.
Old or Worn-Out Faucets: If your Delta bathroom faucet is old, worn-out, or nearing the end of its lifespan, it may be more cost-effective to replace it rather than attempt repairs. A plumber can help you choose a new faucet that meets your needs and install it properly to ensure optimal performance.
Water Damage: If you notice signs of water damage, such as mold or mildew growth, water stains, or warped cabinetry, it’s essential to address the issue promptly to prevent further damage and potential health hazards. A plumber can assess the extent of the damage and recommend appropriate repairs to restore your bathroom to a safe and functional condition.
Safety Concerns: If you encounter any safety concerns during the repair process, such as gas leaks, electrical issues, or structural damage, it’s crucial to stop and seek professional assistance immediately. Attempting to DIY repairs in these situations can pose serious risks to your safety and the integrity of your home.
Simple Ways to Fix a Leaky Delta Bathroom Sink Faucet
How to fix a leaky dripping Delta faucet
Troubleshooting a Leaking Faucet : Delta Faucet
Simple Ways to Fix a Leaky Delta Bathroom Sink Faucet
How to Repair a Leaky Delta Faucet
How To Fix Leaky Bathroom Handle Delta Faucet (Model 4530 Series) Ha Faucet repair, Kitchen faucet with sprayer, Faucet
Learn How to Fix a Leaky Faucet (Delta Bathroom Faucet)
Simple Ways to Fix a Leaky Delta Bathroom Sink Faucet
How to Repair a Delta Tub / Shower Valve – YouTube
Related Posts:


:max_bytes(150000):strip_icc()/delta-faucet-repair-2718845-07-2748f1b8ad2a48d78d3d8fc86e6ed248.jpg)


