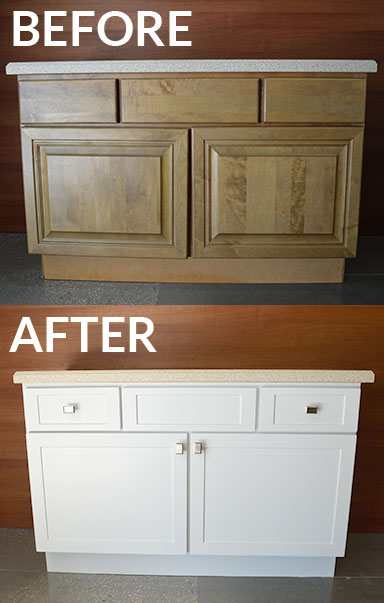
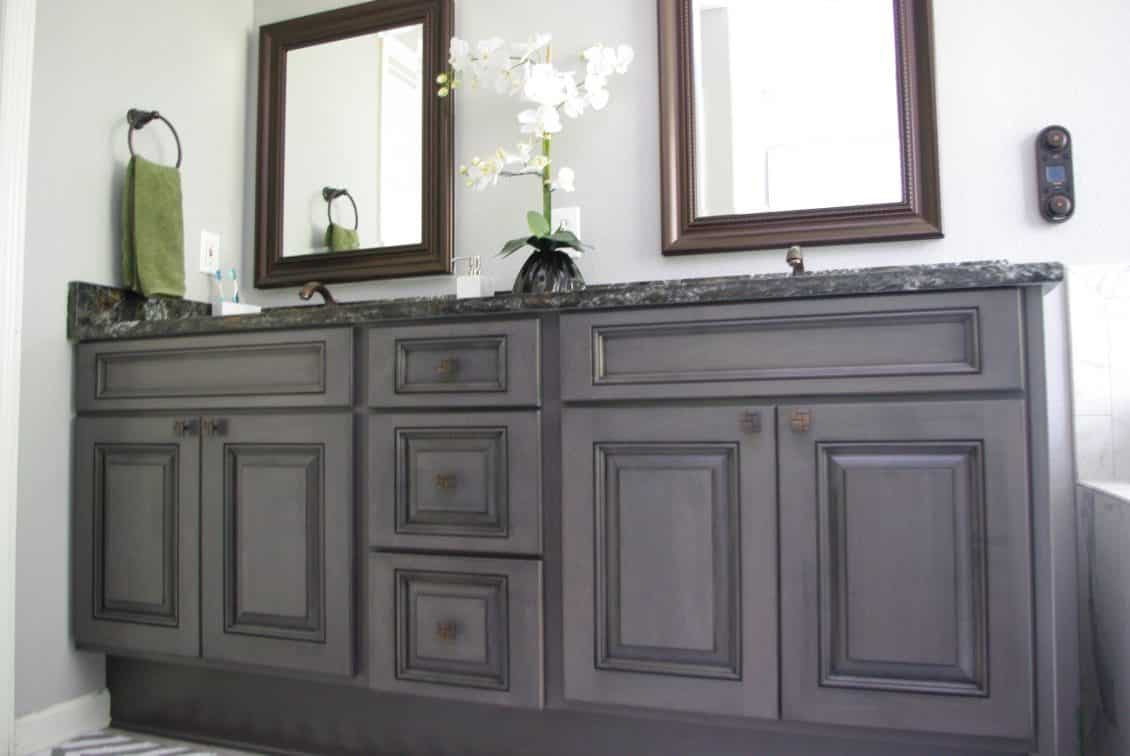
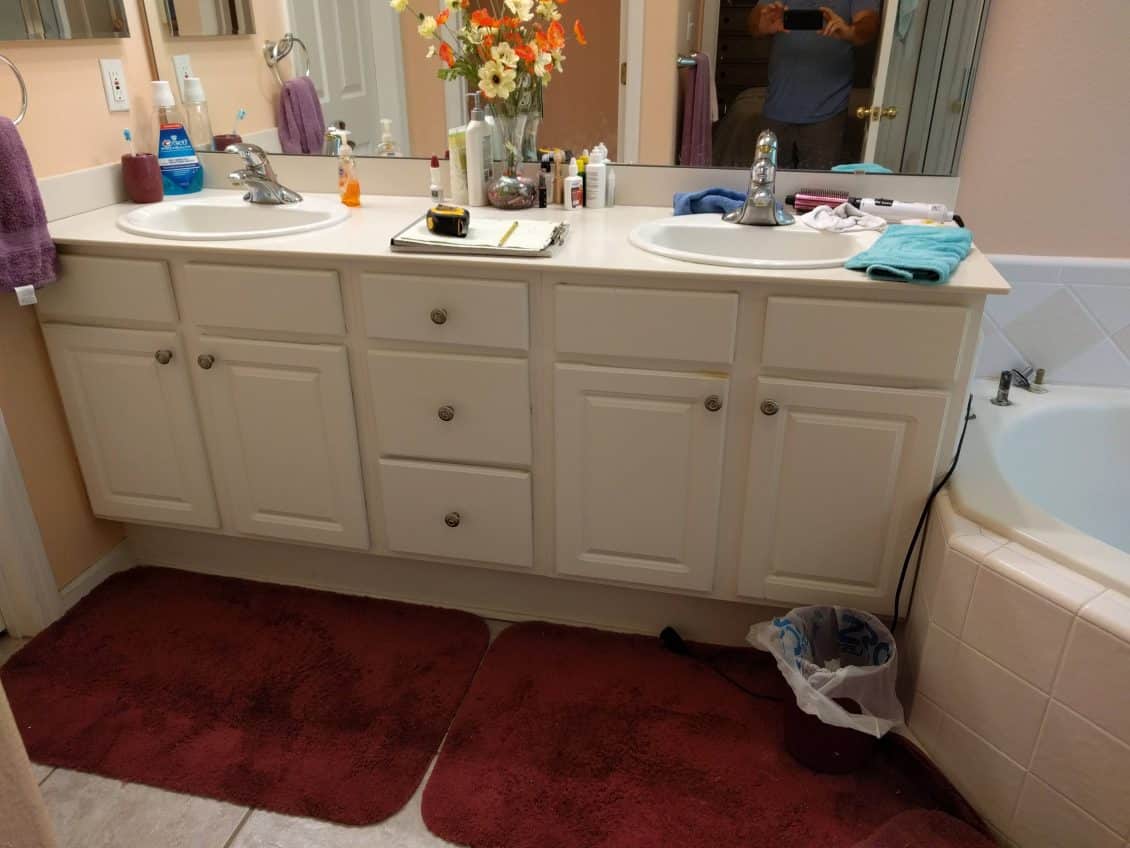
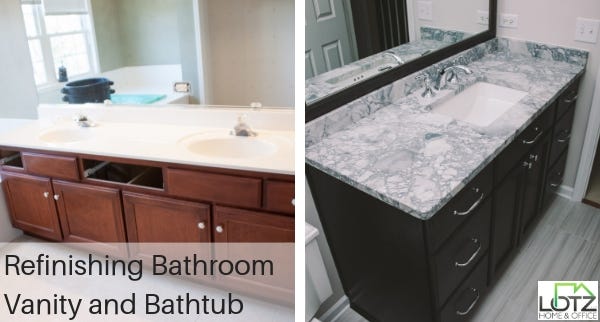
Refacing bathroom cabinets is a cost-effective and efficient way to give your bathroom a fresh new look without the expense and hassle of a full remodel. This process involves replacing the cabinet doors and drawer fronts and applying a new veneer to the existing cabinet boxes. Refacing can dramatically improve the appearance of your bathroom, enhance its functionality, and increase the value of your home. This guide will walk you through the steps of refacing bathroom cabinets, discuss the materials needed, offer design tips, and more.
Benefits of Refacing Bathroom Cabinets
- Cost-Effective Renovation: Refacing bathroom cabinets is significantly cheaper than completely replacing them. New cabinets can be expensive, especially when factoring in the cost of materials, labor, and potential plumbing or electrical adjustments. Refacing typically costs about half as much as new cabinets, making it an attractive option for budget-conscious homeowners looking to update their bathroom without breaking the bank.
- Less Disruption: Refacing cabinets is a less invasive process compared to a full remodel. It involves minimal disruption to your daily routine since the work can be completed quickly—often in a few days. There’s no need to demolish existing structures or deal with the mess and inconvenience of major construction. This makes it a convenient option for families or individuals who need to keep their bathroom functional throughout the renovation process.
- Eco-Friendly Choice: Refacing cabinets is an environmentally friendly option because it reduces waste. Instead of discarding your old cabinets, you’re essentially giving them a facelift. This means fewer materials end up in landfills, and fewer resources are used to produce new cabinets. Additionally, many refacing materials are available in eco-friendly options, further reducing your project’s environmental impact.
- Customization Options: Refacing allows for a high degree of customization. You can choose from a wide range of styles, finishes, and hardware to create a look that perfectly suits your taste and complements your bathroom’s design. Whether you prefer a modern, traditional, or rustic aesthetic, there are numerous options available to achieve the look you want. Customization also extends to the interior of the cabinets, where you can add features like pull-out shelves or specialized storage solutions.
- Improved Functionality: Updating your cabinet doors and drawer fronts isn’t just about aesthetics; it can also enhance functionality. Older cabinets may have worn-out hinges, sliders, or other hardware that impede smooth operation. Refacing provides an opportunity to replace these components with newer, more efficient options. Improved hardware can make your cabinets easier to use and extend their lifespan.
- Increased Home Value: A well-done refacing job can significantly increase the value of your home. Potential buyers often look for modern, updated bathrooms, and refaced cabinets can give your bathroom a contemporary and appealing look. Investing in this upgrade can yield a high return on investment if you decide to sell your home in the future.

Materials Needed for Refacing
Veneer or Laminate Sheets
One of the primary materials needed for refacing cabinets is veneer or laminate sheets. Veneer is a thin layer of real wood that provides a natural look and feel, while laminate is a synthetic material that can mimic the appearance of wood or other finishes. Both options come in a variety of colors and styles, allowing you to choose the one that best fits your design preferences.
New Doors and Drawer Fronts
Replacing the doors and drawer fronts is a key part of the refacing process. These components are available in a wide range of styles, from flat-panel to raised-panel designs. When selecting new doors and drawer fronts, consider the overall aesthetic you want to achieve and ensure they are compatible with your existing cabinet frames.
Adhesive and Tools
Proper adhesive is crucial for attaching veneer or laminate sheets to the existing cabinet surfaces. High-quality contact cement or wood glue is commonly used for this purpose. Additionally, you will need various tools such as a utility knife, trimming tools, sandpaper, and a veneer roller to ensure a smooth and secure application.
Hardware
New hardware, including hinges, handles, and drawer slides, can make a significant difference in both the appearance and functionality of your cabinets. Choose hardware that complements your new cabinet doors and drawer fronts. Soft-close hinges and slides are a popular choice for their smooth and quiet operation.
Finishing Materials
Finishing materials like wood filler, putty, and paint or stain are essential for achieving a polished look. Wood filler can be used to address any imperfections or gaps, while paint or stain can be applied to match or enhance the veneer or laminate. Clear coat finishes can also be applied to protect the surfaces and add a glossy or matte finish.
Safety Equipment
Safety should always be a priority when undertaking a home improvement project. Make sure to have safety equipment on hand, including gloves, safety glasses, and a mask to protect against dust and fumes. Proper ventilation is also important when using adhesives and finishes.
Step-by-Step Refacing Process
Preparation
The first step in refacing your bathroom cabinets is thorough preparation. Start by removing all items from the cabinets and clearing the workspace. Next, remove the cabinet doors, drawer fronts, and all hardware. Clean the cabinet boxes thoroughly to remove any dirt, grease, or residue. This ensures that the adhesive will bond properly to the surfaces.
Measure and Cut Veneer
Measure the dimensions of your cabinet boxes accurately and cut the veneer or laminate sheets to size. Precision is key, so take your time to ensure the measurements are correct. Use a utility knife or a veneer cutter for clean, straight edges. If you’re using wood veneer, sand the edges lightly to smooth out any rough spots.
Apply Adhesive
Apply a thin, even layer of adhesive to both the cabinet surface and the back of the veneer or laminate sheets. Allow the adhesive to become tacky according to the manufacturer’s instructions before pressing the veneer or laminate onto the cabinet surfaces. Use a veneer roller to smooth out any bubbles or wrinkles and ensure a strong bond.
Trim and Sand
Once the veneer or laminate is securely in place, use a trimming tool or utility knife to carefully trim any excess material. Sand the edges lightly to ensure they are smooth and even. If there are any gaps or imperfections, fill them with wood filler and sand smooth once dry.
Install New Doors and Drawer Fronts
Attach the new doors and drawer fronts to the cabinet boxes using the new hardware. Make sure the doors are aligned properly and open and close smoothly. Install the handles or knobs, ensuring they are securely fastened. Soft-close hinges and drawer slides can be installed at this stage for improved functionality.
Finishing Touches
Apply any finishing materials, such as paint, stain, or a clear coat, to protect and enhance the appearance of the cabinets. Allow the finish to dry completely before reassembling the cabinet contents. Finally, replace all items in the cabinets and enjoy your newly refaced bathroom cabinets.
Design Tips for Refacing Bathroom Cabinets
Color Selection
Choosing the right color for your cabinet refacing project is crucial. Neutral colors like white, gray, and beige are timeless and versatile, complementing a wide range of bathroom styles. For a bold and modern look, consider darker shades like navy blue or charcoal. Light colors can make a small bathroom feel larger, while dark colors add drama and sophistication.
Style Matching
Ensure that the style of the new doors and drawer fronts matches the overall design of your bathroom. Flat-panel doors are ideal for a contemporary or minimalist look, while raised-panel doors suit traditional or classic styles. Shaker-style doors are versatile and can work in both modern and traditional settings.
Hardware Coordination
The hardware you choose can significantly impact the final look of your cabinets. Coordinate the hardware finish with other elements in the bathroom, such as faucets, showerheads, and light fixtures. Popular finishes include brushed nickel, chrome, and oil-rubbed bronze. Consistency in hardware finish creates a cohesive and polished look.
Incorporating Glass Inserts
Adding glass inserts to some of the cabinet doors can enhance the visual appeal and provide a lighter, airier feel. Frosted or textured glass offers privacy while still allowing light to pass through. Glass inserts are particularly effective in upper cabinets, where they can showcase decorative items or neatly organized toiletries.
Maximizing Storage
Refacing your cabinets is an excellent opportunity to optimize storage. Consider adding pull-out shelves, lazy Susans, or specialized organizers to make better use of the available space. Vertical dividers can help keep items like baking sheets or cutting boards neatly stored. Efficient storage solutions enhance functionality and make your bathroom more organized.
Lighting Enhancements
Proper lighting can highlight your newly refaced cabinets and create a welcoming ambiance in your bathroom. Under-cabinet lighting is a great addition, providing both task lighting and a soft glow that enhances the overall atmosphere. LED strip lights are energy-efficient and easy to install, making them a practical choice for this purpose.
Maintenance Tips for Refaced Cabinets
Regular Cleaning
Keeping your refaced cabinets clean is essential for maintaining their appearance and longevity. Use a mild soap solution and a soft cloth to wipe down the surfaces regularly. Avoid using harsh chemicals or abrasive scrubbers that can damage the veneer or laminate. For wood veneers, follow the manufacturer’s recommendations for cleaning products.
Handling Spills and Stains
Address spills and stains promptly to prevent damage to the cabinet surfaces. Blot any liquid spills with a soft cloth and clean the area with a mild soap solution. Avoid allowing water or other liquids to sit on the surfaces for extended periods, as this can cause warping or discoloration.
Inspecting Hardware
Regularly inspect the hardware, including hinges, handles, and drawer slides, to ensure they are functioning properly. Tighten any loose screws and replace any damaged or worn-out components. Well-maintained hardware ensures smooth operation and extends the life of your cabinets.
Protecting Surfaces
Protect your cabinet surfaces from scratches and dents by using cutting boards and trivets. Avoid placing hot items directly on the cabinet surfaces, as this can cause damage. Using coasters and placemats can also help protect the finish from spills and stains.
Maintaining Finish
The finish on your cabinets protects the veneer or laminate and enhances its appearance. Over time, the finish may wear down, especially in high-use areas. Periodically apply a fresh coat of clear finish or wax to maintain the protection and luster of the surfaces. Follow the manufacturer’s instructions for the best results.
Avoiding Excessive Moisture
Excessive moisture can cause damage to refaced cabinets, particularly those with wood veneer. Ensure that your bathroom is well-ventilated to prevent moisture buildup. Use exhaust fans during and after showers, and consider placing a dehumidifier in the bathroom if necessary. Wipe down any condensation on the cabinets to prevent moisture-related issues.
Common Mistakes to Avoid
Skimping on Quality Materials
One common mistake is choosing low-quality materials to save money. Cheap veneer or laminate can peel, bubble, or discolor over time, negating the benefits of refacing. Invest in high-quality materials that will stand the test of time and provide a durable and attractive finish.
Poor Preparation
Failing to properly prepare the surfaces before applying veneer or laminate can lead to poor adhesion and a subpar finish. Ensure that the cabinet surfaces are thoroughly cleaned and sanded to remove any old adhesive, grease, or dirt. Proper preparation is essential for a smooth and long-lasting result.
Incorrect Measurements
Accurate measurements are crucial for a successful refacing project. Incorrect measurements can result in misaligned or improperly sized veneer sheets, leading to an uneven and unprofessional look. Take the time to measure carefully and double-check your measurements before cutting materials.
Inconsistent Finishes
Using inconsistent finishes on your cabinets can create a disjointed and unappealing look. Ensure that all the new doors, drawer fronts, and veneers have matching finishes. Pay attention to the hardware as well, and choose finishes that complement each other for a cohesive design.
Ignoring Functionality
Focusing solely on aesthetics and neglecting functionality is a common pitfall. Choose cabinet doors and hardware that are not only stylish but also practical and easy to use. Consider the daily use of your bathroom and ensure that the refaced cabinets meet your functional needs.
Rushing the Process
Rushing through the refacing process can lead to mistakes and a less-than-perfect finish. Take your time to carefully measure, cut, and apply the materials. Allow adequate drying time for adhesives and finishes to ensure a durable and professional result. Patience and attention to detail are key to a successful refacing project.
How long does it take to reface bathroom cabinets?
The time required to reface bathroom cabinets depends on the size of the project and your level of experience. On average, it can take between two to five days to complete the refacing process. This includes time for preparation, application of veneer or laminate, installation of new doors and hardware, and finishing touches.
Can I reface cabinets myself, or should I hire a professional?
Refacing cabinets can be a DIY project if you have basic carpentry skills and the necessary tools. However, it requires precision and attention to detail. If you’re not confident in your abilities or want a flawless finish, hiring a professional may be a better option. Professionals have the experience and equipment to complete the job efficiently and effectively.
What are the costs associated with refacing bathroom cabinets?
The cost of refacing bathroom cabinets varies depending on the materials chosen and the size of the project. On average, homeowners can expect to spend between $1,000 and $3,000 for a standard-sized bathroom. This is significantly less expensive than replacing cabinets, which can cost upwards of $5,000 or more.
What types of veneer or laminate are best for bathroom cabinets?
When choosing veneer or laminate for bathroom cabinets, consider the moisture levels in the bathroom. High-quality, moisture-resistant materials are ideal. Wood veneer offers a natural and elegant look but requires proper sealing to protect against moisture. Laminate is a durable and low-maintenance option that comes in various styles and colors, making it suitable for bathroom environments.
How do I maintain my refaced bathroom cabinets?
Maintaining refaced bathroom cabinets involves regular cleaning with a mild soap solution and a soft cloth. Avoid harsh chemicals and abrasive scrubbers. Address spills and stains promptly, and protect the surfaces from excessive moisture and heat. Periodically inspect and maintain the hardware and finish to keep your cabinets looking their best.
Fluted Bathroom Cabinet Refacing DIY – at home with Ashley
Conquer Your Vanity
Fluted Bathroom Cabinet Refacing DIY – at home with Ashley
How to Reface a Bathroom Vanity Cabinet Dowelmax
Before and After: A Bathroom Vanity Refacing, Tallahassee
Restoring Bathroom Vanities And Bathtubs by Mark Lotz Medium
Related Posts:


