Understanding the Importance of Repairing Bathroom Tile Grout
Maintaining the integrity of your bathroom tile grout is essential for both the aesthetic appeal and functionality of your bathroom. Over time, grout can become cracked, discolored, or even moldy, which not only detracts from the overall appearance of your bathroom but also poses potential health risks. Here are the importance of repairing bathroom tile grout and provide you with valuable insights on how to tackle this task effectively.
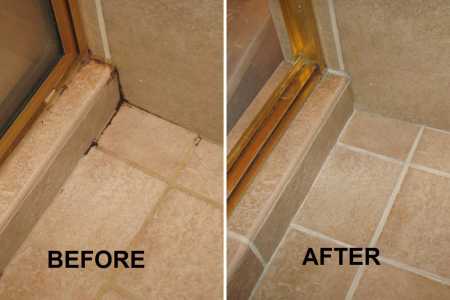
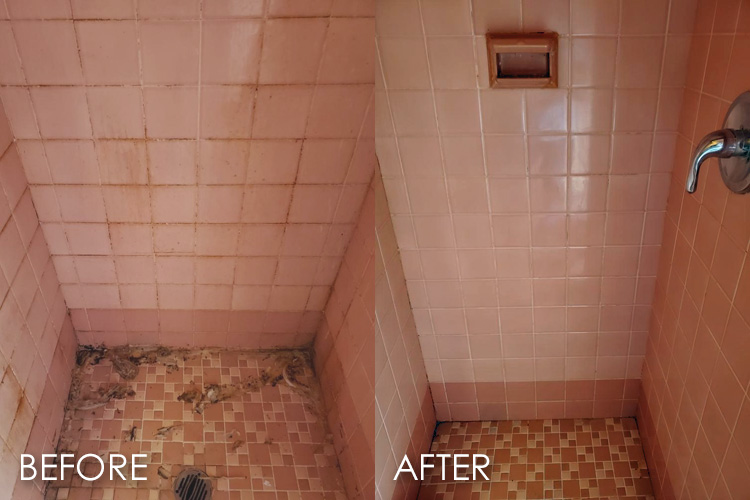
- Enhanced Aesthetic Appeal: Cracked or discolored grout can significantly impact the overall look of your bathroom. It can make even the most beautiful tiles appear worn out and neglected. By repairing the grout, you can restore the original beauty of your bathroom tiles, giving your space a fresh and revitalized look. Whether you have a sleek modern bathroom or a traditional one, well-maintained grout will enhance the overall aesthetic appeal of your space.
- Preventing Water Damage: Cracked grout can allow moisture to seep into the underlying layers, leading to water damage over time. This can result in weakened tiles, loosened adhesive, and even structural issues if left unaddressed. Repairing the grout promptly helps create a watertight seal, preventing water from penetrating the surface and causing costly damage. By keeping your grout in good condition, you can ensure the longevity and durability of your bathroom tiles.
- Promoting Hygiene and Safety: Mold and mildew thrive in damp environments, and bathroom grout is no exception. Cracked or damaged grout can create the perfect breeding ground for these unwanted guests. Not only does mold and mildew make your bathroom look unsightly, but it can also pose significant health risks, especially for those with allergies or respiratory issues. Repairing the grout and keeping it clean will help maintain a hygienic and safe environment in your bathroom.
- Preserving Tile Alignment: Grout not only serves as a protective barrier but also helps to keep your tiles properly aligned. Over time, cracked or deteriorated grout can cause tiles to shift or become uneven. This can lead to potential tripping hazards and further damage to the tiles themselves. By repairing the grout, you can ensure that your tiles remain aligned and stable, providing a smooth and safe surface for everyday use.
- Increasing Longevity: Regular grout maintenance and timely repairs can significantly extend the lifespan of your bathroom tiles. By addressing any grout issues promptly, you can prevent further damage to the tiles and avoid the need for costly tile replacements in the future. Repairing the grout demonstrates your commitment to proper maintenance and helps preserve the investment you’ve made in your bathroom’s aesthetics and functionality.
Identifying Cracked or Discolored Grout
When it comes to repairing bathroom tile grout, accurately assessing the damage is crucial for determining the appropriate course of action. Cracked or discolored grout can be caused by various factors, including age, improper installation, or water damage. We will guide you through the process of assessing grout damage, helping you identify problems and make informed decisions about your repair strategy.
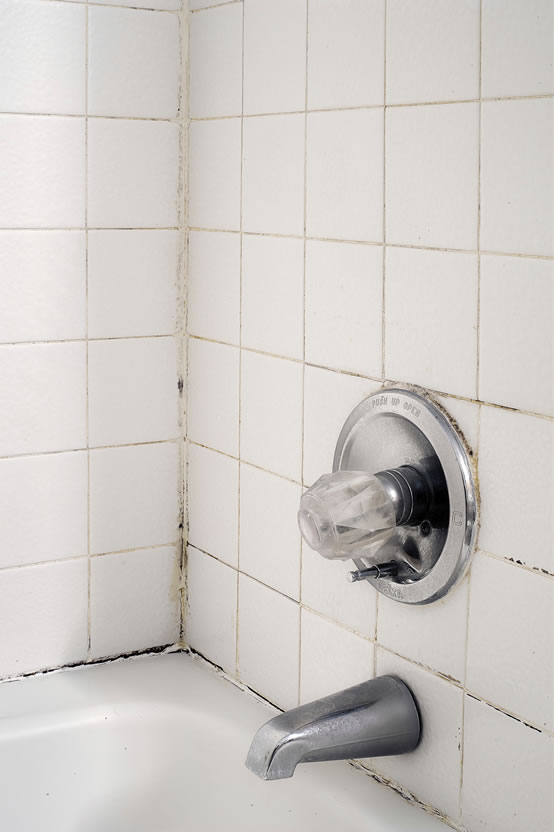
Visual Inspection: Start by conducting a thorough visual inspection of your bathroom grout. Look for any visible cracks, discoloration, or spots of mold or mildew. Pay close attention to areas near water sources, such as showers, tubs, sinks, and toilets. Cracked grout may appear as thin lines, while discolored grout can range from a yellowish hue to dark brown or even black.
Probing the Grout: To determine the severity of grout damage, use a small, sharp object like a toothpick or a grout scraper to gently probe the grout lines. If the grout feels soft or crumbles easily, it indicates significant deterioration and may require more extensive repairs. On the other hand, if the grout feels solid and doesn’t crumble, the damage may be limited to surface-level discoloration.
Water Absorption Test: Another useful method for assessing grout damage is the water absorption test. Dampen a cloth or sponge and press it against the grout lines for a few minutes. Observe if the grout absorbs the water or if it remains relatively unaffected. If the water is absorbed quickly, it suggests compromised grout that may require immediate repair.
Mold and Mildew Examination: Mold and mildew thrive in damp environments, making bathroom grout susceptible to their growth. Check for any signs of mold or mildew, such as black or green spots, fuzzy growth, or a musty odor. If you notice extensive mold or mildew, it’s crucial to address the underlying cause and repair the grout to prevent further growth and potential health hazards.
Consulting a Professional: If you’re unsure about the severity or cause of grout damage, it’s advisable to consult a professional. A tile or grout specialist can provide a comprehensive assessment of the damage, offer expert advice, and recommend the most suitable repair options for your specific situation. Their expertise can help ensure a successful grout repair process and prevent any unnecessary complications.
Removing Old Grout and Preparing the Surface
Before repairing bathroom tile grout, it’s essential to remove the old grout and prepare the surface properly. Removing old grout not only allows for a clean slate but also ensures better adhesion and a seamless finish for the new grout. We will provide you with a step-by-step guide on how to remove old grout and prepare the surface for a successful grout repair project.
Gather the Necessary Tools: Before starting the grout removal process, gather the necessary tools. You will need a grout removal tool (such as a grout saw or an oscillating multi-tool with a grout removal blade), safety goggles, a dust mask, gloves, a sponge, and a bucket of water.
Protect Surrounding Surfaces: To prevent damage to adjacent tiles, protect them by applying painter’s tape or masking tape along the edges. This will create a barrier between the grout removal tool and the surrounding tiles, reducing the risk of accidental scratches or chips.
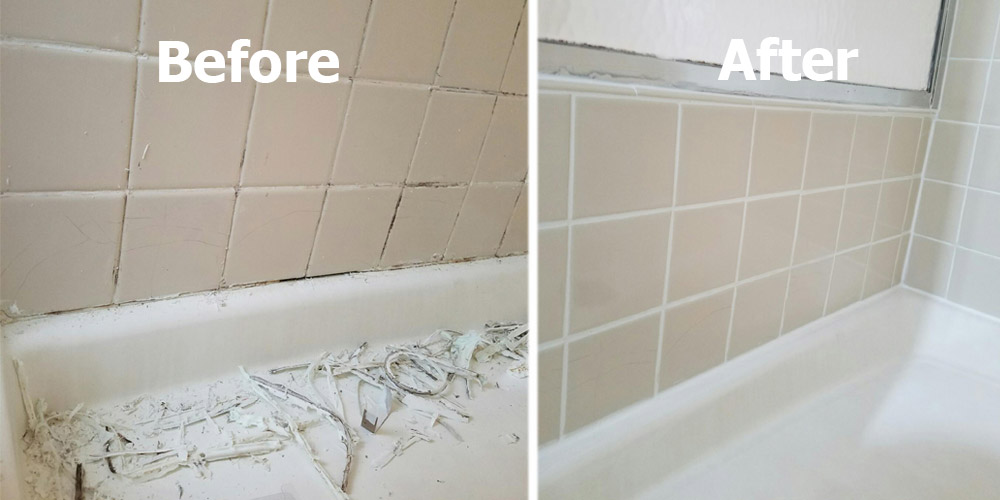
Begin Grout Removal: Using the grout removal tool, carefully and steadily guide the blade along the grout lines. Apply gentle pressure and work in small sections at a time. Be cautious not to chip or damage the tiles. Remove the old grout to a depth of at least 1/8 inch or as specified by the new grout manufacturer.
Clean the Surface: Once the old grout has been removed, clean the surface thoroughly to remove any remaining grout debris or dust. Dampen a sponge and wipe the area, ensuring it is free from any loose particles. Allow the surface to dry completely before proceeding.
Apply Grout Release Agent (Optional): If you are working with porous tiles, applying a grout release agent before grouting can help prevent staining. Follow the manufacturer’s instructions to apply the release agent evenly over the tile surface. Allow it to dry before moving on to the grout application.
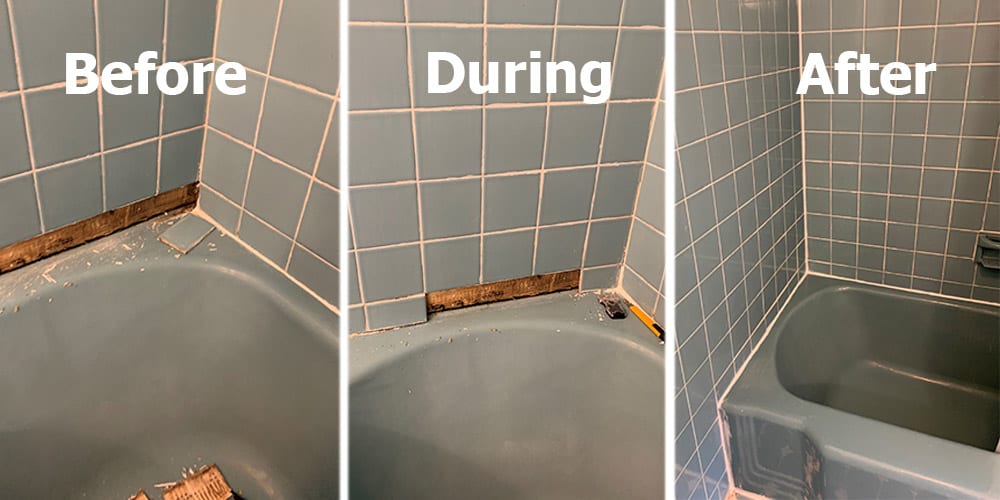
Seal the Edges: To ensure a watertight seal and prevent moisture from seeping under the tiles, seal the edges with a silicone caulk. Apply the caulk along the perimeter of the tiled area, smoothing it with a caulk gun or a finger. Remove any excess caulk for a neat finish.
Tips for Achieving a Seamless Finish
Applying grout is a critical step in repairing bathroom tile grout and plays a significant role in achieving a seamless finish. Proper grout application requires attention to detail and careful execution. We will share valuable tips to help you master the art of grout application, ensuring a flawless and long-lasting result for your bathroom tile repair project.
Choose the Right Grout: Before beginning the grout application, ensure that you have selected the right type of grout for your specific tiles and project. There are various types of grout available, including sanded, unsanded, epoxy, and urethane grouts. Consider factors such as tile spacing, tile material, and the location of the tiled area to determine the most suitable grout type.
Mix Grout Properly: Follow the manufacturer’s instructions to mix the grout accurately. Use a clean bucket and add the grout powder to the water gradually, stirring continuously to achieve a smooth, lump-free consistency. Allow the grout to sit for a few minutes before giving it another gentle stir.
Work in Small Sections: To ensure a seamless finish, it’s best to work in small sections when applying grout. Start by applying the grout to a manageable area, such as a few square feet, rather than attempting to cover the entire tiled surface at once. This allows you to focus on achieving an even application and prevents the grout from drying out before you can properly work it into the tile joints.
Use the Right Tools: Having the right tools for grout application is essential. A grout float is typically used to spread the grout over the tiles and into the joints. Ensure that the float is clean and in good condition to avoid unwanted streaks or scratches on the tiles. Additionally, a grout sponge or damp cloth will be necessary for cleaning off excess grout from the tiles.
Apply Grout at a 45-Degree Angle: When applying grout, hold the grout float at a 45-degree angle to the tiled surface. This angle allows you to press the grout firmly into the joints while also minimizing the risk of removing too much grout from the joints. Use a sweeping motion to ensure the grout fills the joints completely and evenly.
Work Grout into the Joints: To achieve a seamless finish, it’s crucial to work the grout into the joints thoroughly. Use the edge of the grout float to press the grout into the joints, ensuring that there are no gaps or air pockets. Work in a diagonal or circular motion to ensure the grout is evenly distributed and properly packed into the joints.
Clean Off Excess Grout: After applying the grout to a section, allow it to be set for a few minutes according to the manufacturer’s instructions. Once the grout has set slightly, use a slightly damp grout sponge or cloth to clean off the excess grout from the tiles. Wipe diagonally across the tiles to avoid pulling grout out of the joints. Rinse the sponge or cloth frequently and continue cleaning until the tiles are clean and the grout lines are smooth and uniform.
Finishing Touches: Once you have completed the grouting process, allow the grout to cure according to the manufacturer’s instructions. This usually involves keeping the area dry and avoiding heavy foot traffic for a specified period. After the grout has fully cured, you can apply a grout sealer to protect the grout from staining and moisture.
Maintaining and Preventing Future Grout Issues
After repairing bathroom tile grout, it’s important to establish a maintenance routine and implement preventive measures to ensure the longevity and durability of your grout. Regular maintenance and proper care can help prevent future grout issues, such as cracking, discoloration, and mold growth. We will discuss some best practices for maintaining and preventing future grout issues, allowing you to enjoy long-lasting results from your grout repair efforts.
Keep the Grout Clean: Regular cleaning is crucial for maintaining grout in good condition. Use a mild, pH-neutral cleaner specifically formulated for grout and avoid harsh chemicals that can damage the grout or tiles. Regularly wipe down the grout lines with a soft brush or non-abrasive sponge to remove dirt, soap residue, and other build-up that can lead to discoloration or mold growth.
Avoid Abrasive Cleaning Methods: When cleaning grout, avoid using abrasive cleaning methods or tools that can damage or wear down the grout. Scrubbing with harsh brushes, steel wool, or abrasive cleaners can erode the grout and cause it to weaken or crack over time. Stick to gentle cleaning techniques to protect the integrity of the grout.
Maintain Proper Ventilation: Proper ventilation in your bathroom is essential for preventing excess moisture, which can contribute to mold and mildew growth. Ensure that your bathroom is well-ventilated by using exhaust fans or opening windows during and after showers or baths. This helps to reduce humidity levels and keep the grout dry, preventing the growth of mold and mildew.
Address Leaks and Water Damage Promptly: Water leaks or damage can quickly compromise the integrity of grout. If you notice any signs of leaks, such as water stains, peeling paint, or dampness, address them promptly. Fix any leaks and repair water damage to prevent further deterioration of the grout and underlying structures.
Reapply Grout Sealer: Grout sealers provide an additional layer of protection against staining and moisture penetration. Over time, the protective sealant can wear off, so it’s important to reapply the grout sealer periodically. Refer to the manufacturer’s instructions for the recommended frequency of resealing, as it can vary depending on the type of grout and sealer used.
Avoid Heavy Impact or Weight: To prevent cracking or loosening of grout, avoid placing heavy objects or subjecting the tiled surface to excessive impact or weight. This includes avoiding dropping heavy items on the tiles or standing on them with excessive force. Taking care to avoid unnecessary stress on the grout will help maintain its integrity and prevent future issues.
Conduct Regular Inspections: Perform regular inspections of your grout lines to catch any signs of damage or deterioration early on. Look for cracks, discoloration, or areas where the grout may have become loose. By catching and addressing issues early, you can prevent them from escalating into more significant problems.
Prevent Expensive Bathroom Repairs ProMaster
Quick Tub Grout Repair
Is cracked grout a problem? – Is grout repair easy? – The Grout Medic
How to Repair Cracked Tile Grout: An Easy Guide- The Lived-in Look
Tile and Grout Repair Before u0026 After The Grout Medic of Northern
Don’t Replace Your Tile Tile Repair The Grout Medic
Related Posts:
- Bathroom Tile Threshold
- Ceramic Bathroom Tile Accessories
- Baby Blue Bathroom Tiles
- Blue Bathroom Tile Stickers
- Small Bathroom Tile Design Pictures
- Bathroom Tile White Ideas
- Bathroom Tile Selection Ideas
- How To Remove Bathroom Tiles From Plasterboard
- How To Clean Old Bathroom Tile Floor
- Regrout Bathroom Tile Cost


