Understanding the Different Types of Drill Bits for Bathroom Tiles
When it comes to drilling holes in bathroom tiles, using the right drill bit is crucial for achieving clean and precise results. There are several types of drill bits specifically designed for tile installation, each with its unique features and benefits. Let’s discuss the different types of drill bits commonly used for bathroom tiles.
- Carbide-Tipped Drill Bits: Carbide-tipped drill bits are a popular choice for drilling holes in bathroom tiles. These drill bits feature a carbide tip that is extremely durable and can withstand the hardness of ceramic, porcelain, or natural stone tiles. The carbide tip is designed to stay sharp for a longer period, allowing for multiple uses. When using carbide-tipped drill bits, it is essential to apply steady pressure and avoid excessive force to prevent the tile from cracking.
- Masonry Drill Bits: Masonry drill bits are another option for drilling holes in bathroom tiles. These bits are specifically designed for drilling into hard materials such as concrete, brick, or stone. While they may not be as effective for softer tiles like ceramic, they can be useful for drilling holes in the wall behind the tiles. It is important to note that masonry drill bits can be more aggressive, so it is essential to use them with caution to avoid damaging the tile.
- Glass and Tile Drill Bits: Glass and tile drill bits are specifically designed for drilling holes in delicate materials like glass and ceramic tiles. These bits have a spear-shaped carbide tip that helps to reduce the chance of cracking or chipping the tile. They also have a unique flute design that allows for efficient chip removal and prevents overheating. When using glass and tile drill bits, it is recommended to apply light pressure and use a lubricant to keep the bit cool.
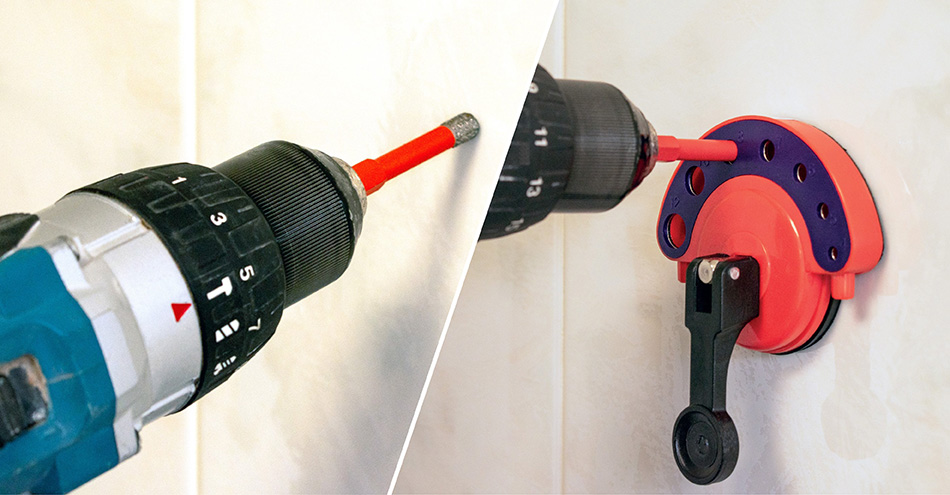
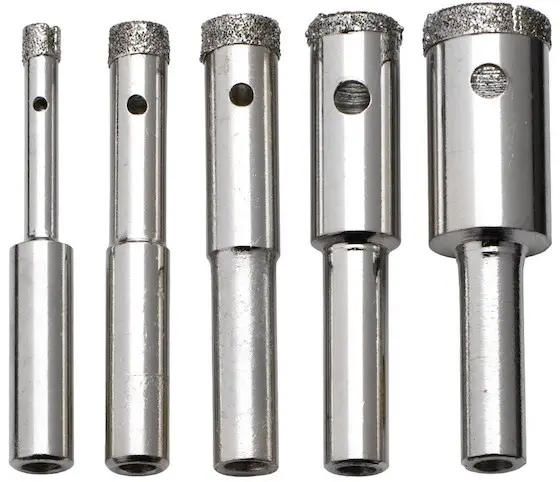
- Diamond-Tipped Drill Bits: Diamond-tipped drill bits are the most advanced and expensive option for drilling into bathroom tiles. These bits feature a diamond coating that provides superior cutting performance and durability. Diamond-tipped drill bits are highly effective for drilling into hard tiles like porcelain or natural stone. They can also be used for drilling holes in glass and ceramic tiles. However, due to their high cost, they are typically reserved for professional use or special projects.

Choosing the Right Drill Bit Size for Your Bathroom Tiles
When it comes to drilling holes in bathroom tiles, selecting the right drill bit size is essential for achieving the desired hole diameter. Using the wrong size can result in cracks, chips, or even the need for rework. Here are the factors to consider when choosing the right drill bit size for your bathroom tiles.
Tile Thickness: The thickness of your bathroom tiles plays a significant role in determining the appropriate drill bit size. Thicker tiles will require larger drill bits to create holes of the desired diameter. It is important to measure the thickness of your tiles accurately before selecting a drill bit size.
Hole Diameter: Consider the size of the holes you need to drill in your bathroom tiles. Different projects may require different hole sizes, such as small holes for mounting accessories or larger holes for plumbing connections. Ensure that the drill bit size you choose matches the desired hole diameter to avoid any complications during installation.
Tile Material: The type of tile material also influences the drill bit size selection. Softer materials like ceramic tiles may require smaller drill bits, while harder materials like porcelain or natural stone tiles may require larger drill bits. It is important to choose a drill bit size that matches the hardness of your tile material to ensure a clean and precise hole.
Fixture Requirements: Consider the fixtures or accessories that you plan to install in your bathroom tiles. Some fixtures may have specific requirements for hole size, which will dictate the drill bit size you need to use. It is crucial to consult the manufacturer’s guidelines or instructions to ensure that you choose the right drill bit size.
Pilot Holes: In some cases, creating pilot holes before drilling the final hole can be helpful, especially for larger hole sizes. Pilot holes serve as guides and help to prevent tile cracking or chipping. When using pilot holes, choose a smaller drill bit size that matches the desired hole diameter, and gradually increase the size until you reach the desired diameter.
Exploring the Benefits of Diamond-Tipped Drill Bits for Tile Installation
Diamond-tipped drill bits are known for their superior cutting performance and durability, making them a popular choice for tile installation projects. Below are the benefits of using diamond-tipped drill bits for drilling holes in bathroom tiles.
Exceptional Hardness: One of the key advantages of diamond-tipped drill bits is their exceptional hardness. Diamond is one of the hardest materials on Earth, allowing these drill bits to effortlessly cut through hard tile materials like porcelain or natural stone. Their hardness ensures that the drill bit remains sharp for a longer time, providing consistent performance throughout the drilling process.
Clean and Precise Holes: Diamond-tipped drill bits produce clean and precise holes in bathroom tiles. The sharpness of the diamond coating allows for smooth and accurate drilling, resulting in holes with minimal chipping or cracking. This is particularly important when working with delicate or high-end tiles, as it helps to maintain their aesthetic appeal.
Longevity and Durability: Diamond-tipped drill bits are highly durable and have a longer lifespan compared to other drill bit types. The diamond coating provides excellent resistance to wear and tear, allowing the drill bit to maintain its cutting performance even after multiple uses. This makes diamond-tipped drill bits a cost-effective option for professional tile installers or homeowners who frequently undertake tile installation projects.
Versatility: Diamond-tipped drill bits are versatile and can be used for drilling various tile materials, including ceramic, porcelain, glass, or natural stone. Their ability to cut through different types of tiles makes them a versatile option for a wide range of bathroom tile installation projects. They are particularly useful when drilling holes for plumbing connections or mounting accessories.
Reduced Heat Build-up: When drilling into hard tile materials, heat build-up can be a concern. Excessive heat can damage the tile or even cause the bit to become dull quickly. Diamond-tipped drill bits have excellent heat dissipation properties, which help to reduce heat build-up during the drilling process. This ensures that the tile remains cool and minimizes the risk of damage.
How to Drill Holes in Bathroom Tiles Safely and Efficiently
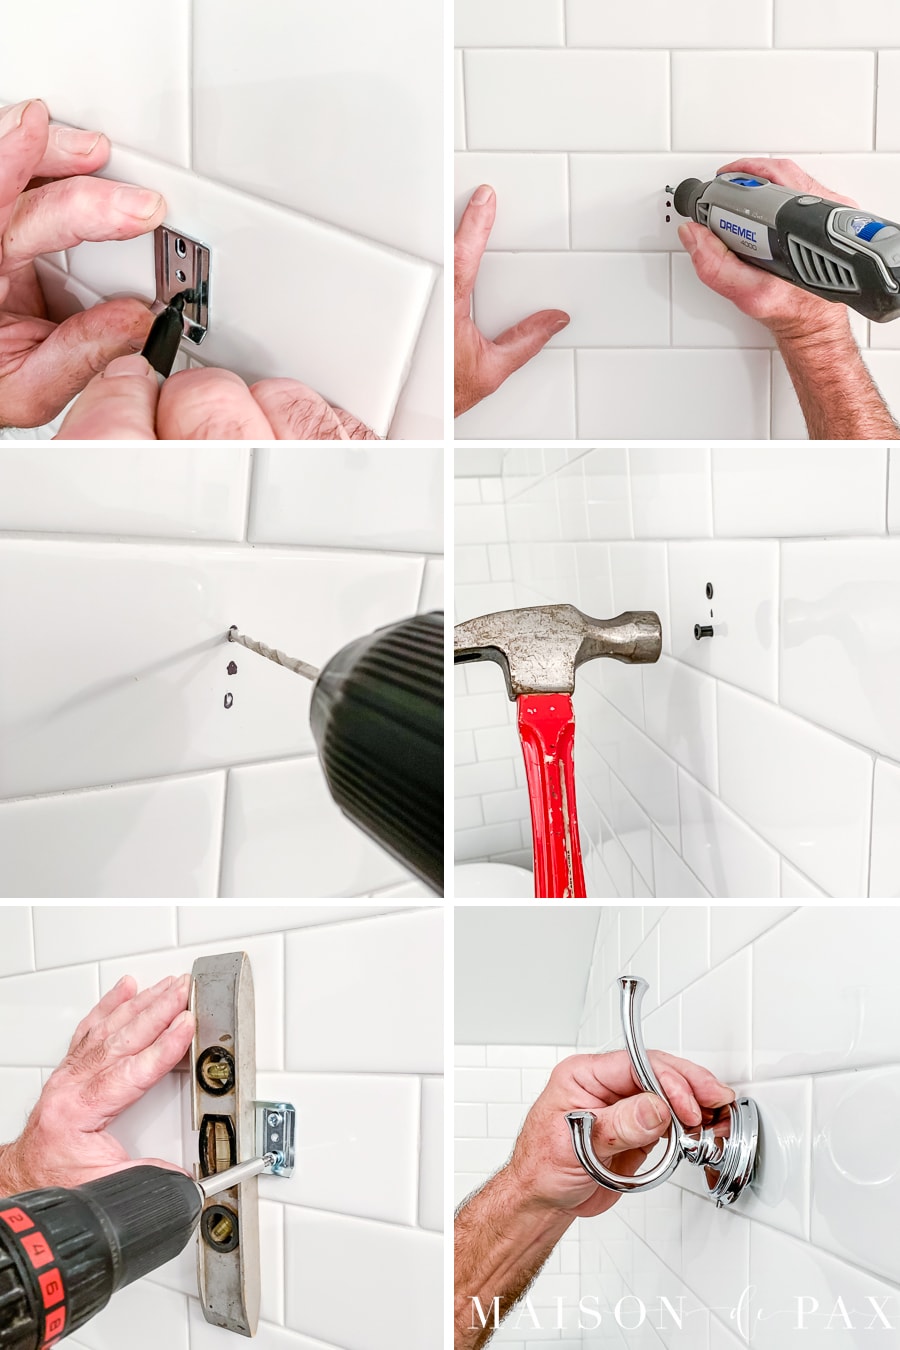
Drilling holes in bathroom tiles requires precision and care to avoid damaging the tiles. By following a step-by-step guide, you can ensure safe and efficient drilling. Below we provide a detailed guide on how to drill holes in bathroom tiles.
Gather the Necessary Tools: Before you begin, gather all the necessary tools and equipment. This includes a drill with the appropriate drill bit, masking tape, a pencil or marker, a level, and safety equipment such as safety glasses and gloves.
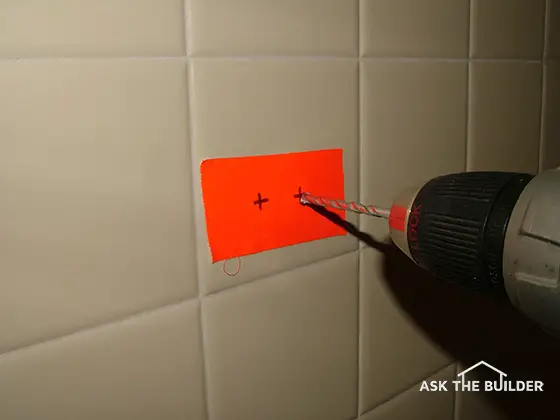
Mark the Hole Locations: Using a pencil or marker, mark the exact locations where you want to drill the holes on the bathroom tiles. Use a level to ensure that the marks are straight and even. For multiple holes, measure and mark each hole individually.
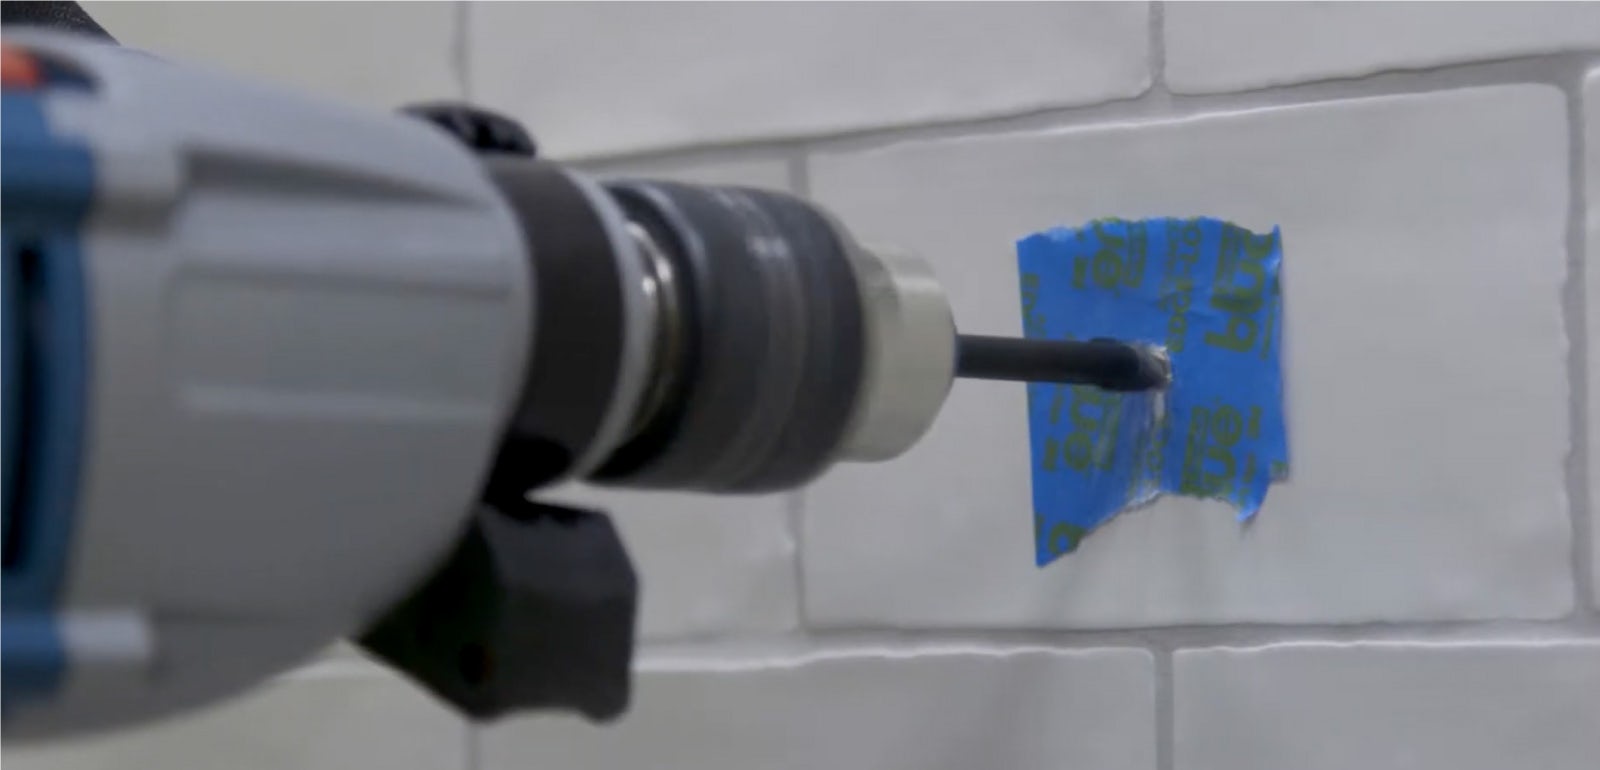
Apply Masking Tape: To prevent the drill bit from slipping or scratching the tile surface, apply a piece of masking tape over the marked hole locations. The tape will provide a better grip and protect the tile from potential damage.
Set the Drill: Insert the appropriate drill bit into the drill chuck and tighten it securely. Ensure that the drill is set to the correct drilling speed for the tile material being drilled. Refer to the manufacturer’s instructions for specific recommendations.
Start Drilling: Position the drill bit over the marked hole location on the masking tape. Apply gentle pressure and start drilling at a low speed to create a pilot hole. Gradually increase the drilling speed as the hole becomes deeper. Use a smooth and steady motion, avoiding excessive force.
Use Coolant/Lubricant: To prevent overheating and prolong the life of the drill bit, consider using a coolant or lubricant specifically designed for tile drilling. Apply a small amount to the drill bit and the hole periodically during the drilling process. This will help keep the drill bit cool and reduce the risk of tile damage.
Clean and Inspect: Once the hole is drilled, remove the masking tape and clean the area. Inspect the hole to ensure that it is clean, smooth, and free of any chips or cracks. If necessary, use a tile file or sandpaper to smooth any rough edges.
Tips and Tricks for Maximizing the Lifespan of Your Drill Bits when Working with Bathroom Tiles
Drill bits are essential tools for drilling holes in bathroom tiles, and it is important to maximize their lifespan to avoid frequent replacements. By following some tips and tricks, you can extend the lifespan of your drill bits. Here are some useful tips for maximizing the lifespan of your drill bits when working with bathroom tiles.
Choose the Right Drill Bit for the Tile Material: Using the appropriate drill bit for the specific tile material is crucial. Each tile material may require a specific type of drill bit, such as carbide-tipped for ceramic, diamond-tipped for porcelain or natural stone, or glass and tile drill bits for delicate tiles. Using the wrong drill bit can cause premature wear and reduce the lifespan of the bit.
Use the Correct Speed and Pressure: Using the correct drilling speed and pressure is essential for maximizing the lifespan of your drill bits. Excessive speed or pressure can cause the drill bit to overheat and wear out quickly. Follow the manufacturer’s recommendations for the optimal drilling speed and apply gentle and consistent pressure during the drilling process.
Use Coolant or Lubricant: Using a coolant or lubricant specifically designed for tile drilling can significantly reduce friction and heat build-up. Apply a small amount of coolant or lubricant to the drill bit and the hole periodically during the drilling process. This will help keep the drill bit cool and prolong its lifespan.
Avoid Excessive Force: Applying excessive force while drilling can not only damage the tile but also put unnecessary strain on the drill bit. Let the drill bit do the work and avoid forcing or pushing it too hard. Applying steady and moderate pressure will help preserve the integrity of the drill bit and extend its lifespan.
Clean and Maintain the Drill Bits: Regularly cleaning and maintaining your drill bits can greatly enhance their lifespan. After each use, remove any debris or tile dust from the drill bit. You can use a brush or compressed air to clean the bit thoroughly. Additionally, inspect the drill bit for any signs of damage or wear and replace it if necessary.
Store Drill Bits Properly: Proper storage is important for maintaining the condition of your drill bits. Store them in a dry and clean place, preferably in a case or organizer that keeps them protected and prevents them from coming into contact with other tools or materials. This will help prevent unnecessary damage and extend their lifespan.
How to Drill Into Tile and What Drill Bit to Use for Tiles
How to Drill Ceramic Tile
How to Drill Ceramic Tile
How to Drill a Hole in a Ceramic Tile Tutorial Video Guide DIY Screwfix
The Best Drill Bits for Tile of 2022 – Picks from Bob Vila
How to Drill Through Tiles Without Cracking Them
How to drill through a tile without damaging it VictoriaPlum.com
How to Drill Through Tiles Without Cracking Them – Tile Mountain
How to Drill into Tile to Hang Things – Maison de Pax
Related Posts:
- Bathroom Tile Decorating Ideas Pictures
- Vintage Bathroom Tile Colors
- Bathroom Tile Accent Ideas
- How To Fix Broken Bathroom Tile
- Bathroom Tile Cleaner Recipe
- How To Clean Bathroom Tile Grout Naturally
- Bathroom Tile Scrubber Machines
- Zen Bathroom Tile Ideas
- Bathroom Tile And Floor Ideas
- Bathroom Tile Herringbone


